Patient Tooth Chart
Use the tooth chart to record and review the state and health of your patients'
teeth
![]() Numbering Method and Viewing Options
Numbering Method and Viewing Options
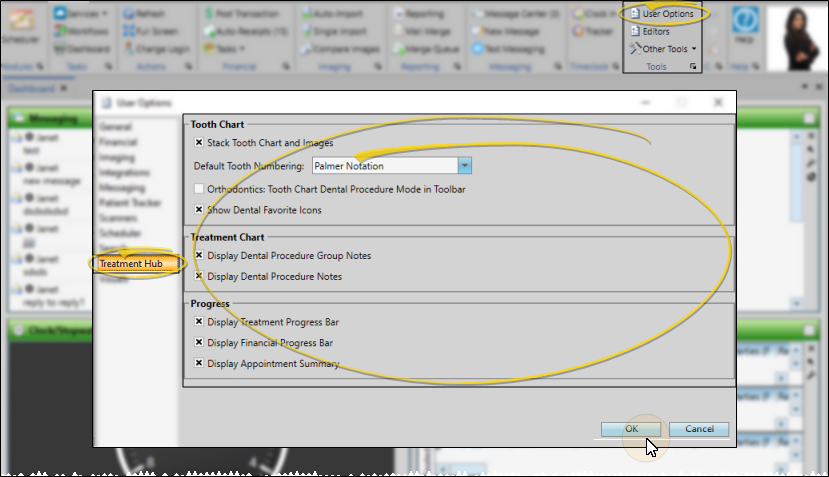
Use your Treatment Hub user options to choose your primary tooth numbering method, determine how your tooth chart is displayed in patient folders, and choose additional details to include on the Treatment Hub screen. See "Treatment Hub User Options" for details.
Use the Dental Conditions and Dental Procedures editors to customize how tooth conditions and procedures appear on the tooth chart.
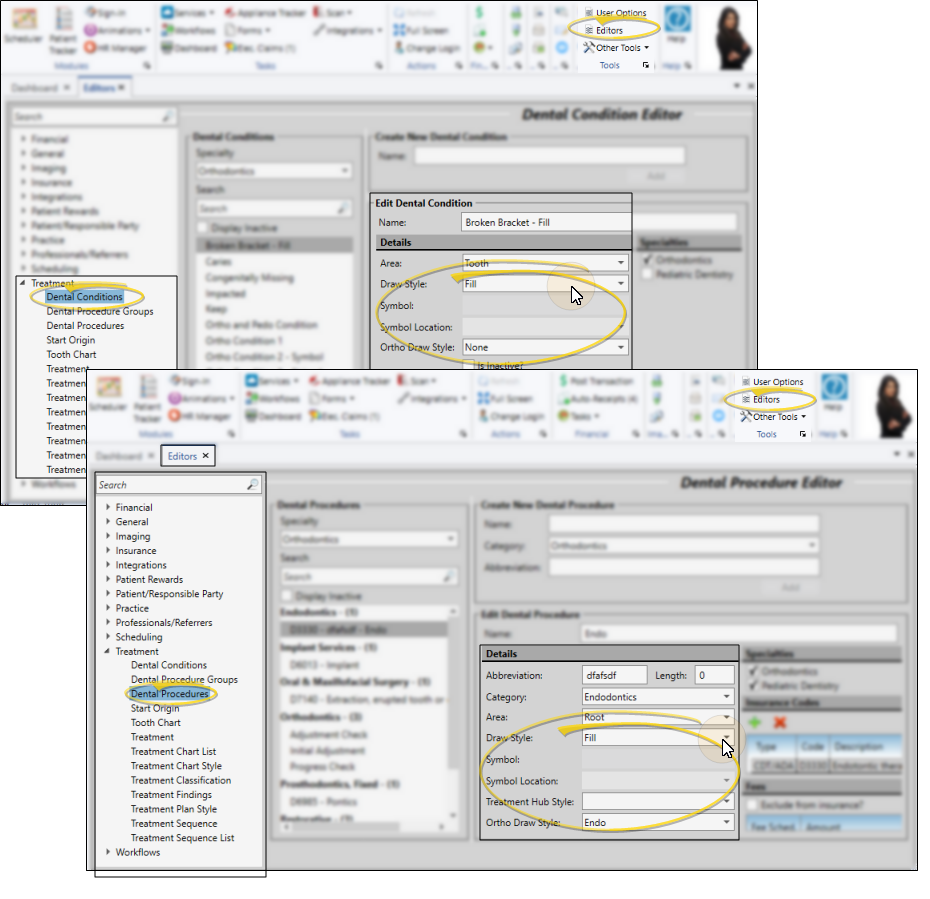
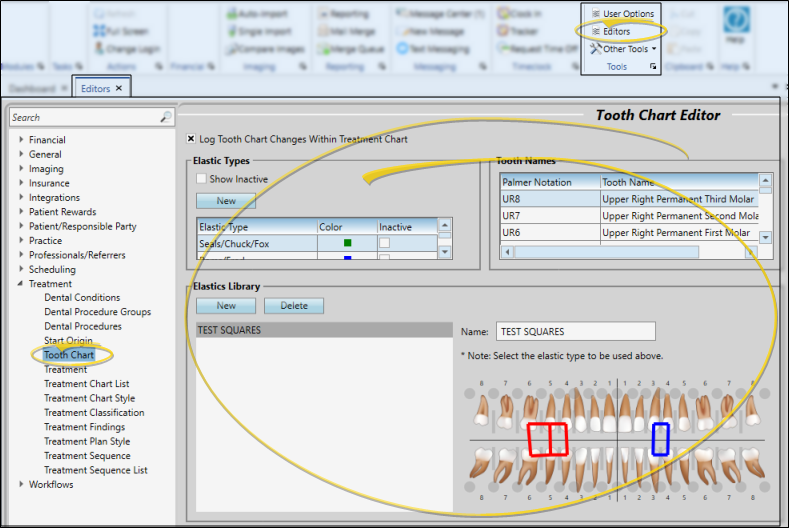
![]() Tooth Numbers and Elastics Templates
Tooth Numbers and Elastics Templates
Use the Tooth Chart editor to edit tooth names, as well as to set up the list of elastic types and elastics templates to use with your patient tooth charts. You also enable / disable the treatment chart / tooth chart integration with this
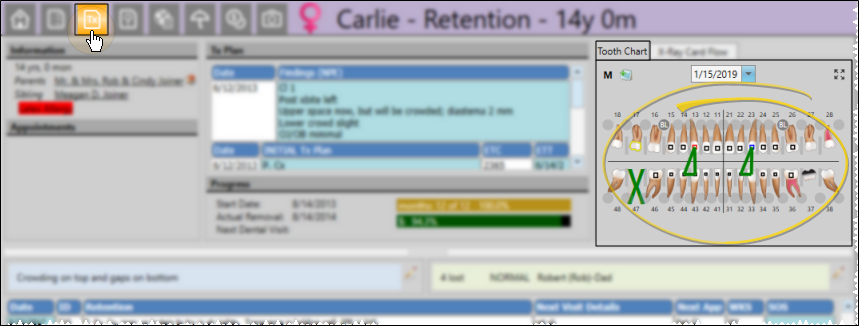
The tooth chart appears in the header of the patient's  Treatment Hub page. You can both view and edit the tooth chart from this window. If you do not see the tooth chart, the header section of the page might be hidden. To show it again, click the
  Header icon in the Treatment Chart section of the Patient ribbon bar (or press F8 on your keyboard).
When you display the tooth chart and patient images as "stacked" in the header of your Treatment
The tooth chart appears at the bottom of the patient's  Treatment Findings page. To make changes to either the patient's findings or tooth chart data, click the Edit link at the top of the window.
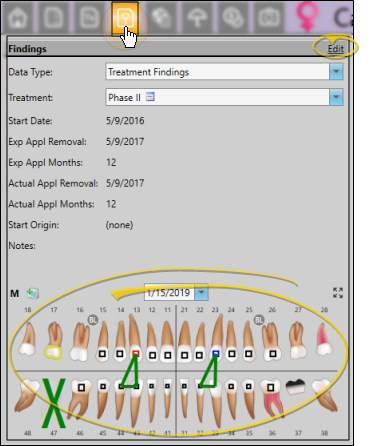
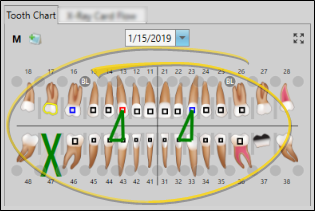
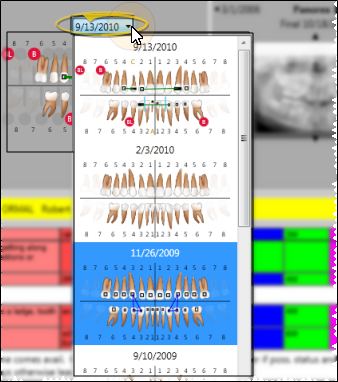
Tooth chart data is saved by date, with the most current data appearing when you first open the tooth chart. You can use the drop down field to choose a different date to view. When you link an image to a tooth chart (described below), that image is the same for all tooth chart records.
Use the Tooth Numbering section of the Patient ribbon bar to temporarily change the tooth numbering system to display. When you exit and reload a patient's folder, your default tooth numbering system will be used.

Click the  Multi-Chart Toggle icon from the Tooth Chart section of the Patient ribbon bar to switch a tooth chart to display either a single chart with all teeth combined, or a split chart showing adult and child teeth separately.
Overwrite Warning - Be sure you select the appropriate multi-chart mode before making changes to the tooth chart: Toggling the multi-chart mode for a saved tooth chart may result in data loss.

Click the  Full Screen icon in the upper right corner of the tooth chart to toggle viewing the chart in full screen mode. You can also click Header in the Treatment Chart section of the Patient ribbon bar (or press F8 on your keyboard) to toggle showing / hiding the tooth chart and other header information, allowing full screen display of treatment chart records.

Your tooth chart will display several different icons, depending on the conditions, procedures and notes that have been applied to it.
 /
/  - Dentition: Deciduous / permanent tooth, respectively. See "Dentition" for details.
 /
/
 /
/  - Dental Conditions: Caries, Endo, Impacted, Keep. You may see alternate or additional tooth condition icons in your tooth chart as well. See "Dental Conditions" for details.
 /
/  /
/  /
/  /
/  - Dental Procedures: Crowns, Filling, Implant, Pontics: You may see alternate or additional dental procedure icons in your tooth chart as well. See "Dental Procedures" for details.
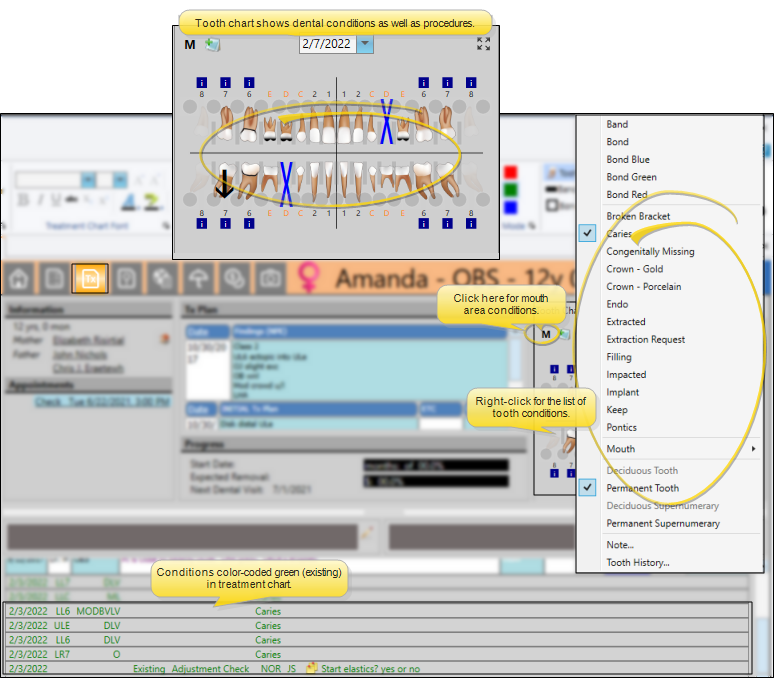
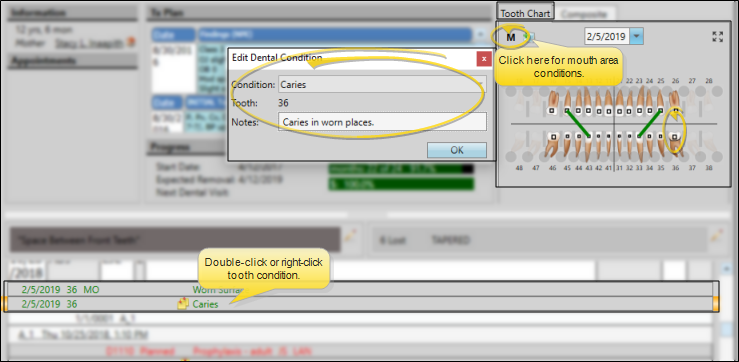
M - Mouth Conditions / Procedures: Hover or click the letter "M" in the upper-left corner of the tooth chart to view and edit any mouth or other area conditions and dental procedures you have applied for this patient. See "Dental Conditions" and "Dental Procedures" for details.
 - Extraction: See "Extractions" for details.
 - TAD: See "Tads" for details.
![]() - Spacer: See "Spacers" for details.
- Spacer: See "Spacers" for details.
 /
/  - Bonded / Banded: See "Bonding / Banding" for details
 - Elastics: See "Elastics" for details.
 - Linked Image: See "Linked Images" for details.
 - Tooth Notes: Hover or right-click this icon to view and edit notes you have made about this tooth. See "Tooth Notes" for details.
 Tooth Chart Notes - Click this icon to view and edit notes you have made about this patient's tooth chart. See "Tooth Chart Notes" for details.
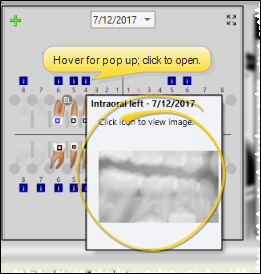
While viewing the patient's tooth chart, you can hover over the Information icon to pop up a thumbnail of the image that is linked to that tooth, or click the icon to open the patient's Imaging page, with that image maximized.See "Link X-Ray Images to Tooth Chart" for details.
You must apply dentition before you can add tooth conditions, procedures, elastics, TADs, bands, or any other other element to the tooth chart.
Select a template from the Default Dentition section of the Patient ribbon bar to apply that template to the tooth chart.
Overwrite Warning - Any individual tooth dentition you have applied will be overwritten by the template.

![]() Update Individual Tooth Dentition
Update Individual Tooth Dentition
To update the dentition of an individual tooth enable the Tooth Type option from the Tooth Action section of the Patient ribbon bar, then click the tooth you want to work with. Or right-click the tooth to select the appropriate dentition stage.
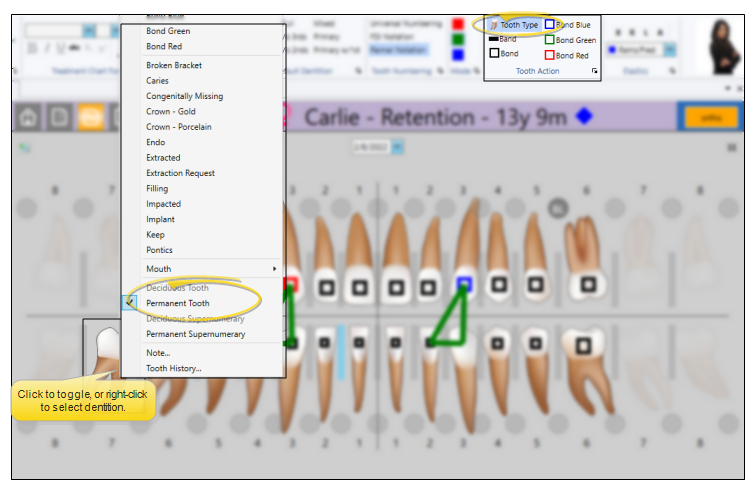
Click vs Drag Tooth Chart Actions - When you click and release a tooth, the tooth chart toggles the dentition stage. When you click and hold a tooth, you can then drag to add elastics..
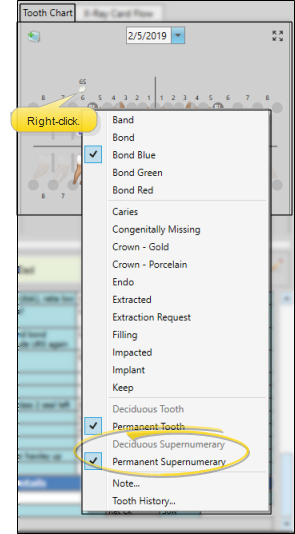
Right-click the position of the tooth, and select either Deciduous Supernumerary or Permanent Supernumerary. An icon and tooth number, followed by the letter "s" will appear in that position in the tooth chart.
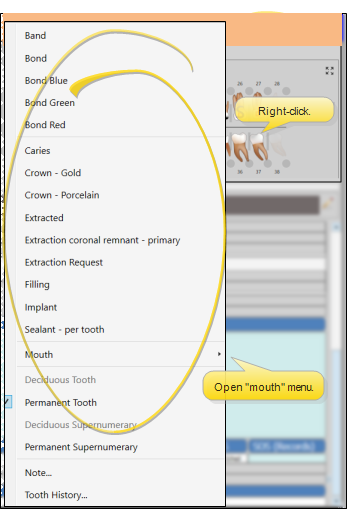
Once applied, the draw style you have set up in your Dental Conditions editor will appear in the tooth chart for conditions applied to individual teeth. You can right-click a tooth to view the applied conditions and the tooth history. To view conditions applied to the whole mouth or other areas, hover over or click the "M" in the upper left corner of the tooth chart.
You can also use the  Filters icon in the Treatment Chart section of the Patient ribbon bar to include dental conditions in the patient's treatment chart. Dental conditions are assumed to be "existing", so they are color-coded green.
![]() Edit / Audit / Delete Dental Conditions
Edit / Audit / Delete Dental Conditions
After applying dental conditions with the patient's tooth chart, you can right-click the tooth in the tooth chart to remove the condition. In addition, you can right-click or double-click the condition in the patient's 's treatment chart to edit supporting details, audit, and delete the condition. Conditions applied to a mouth area are edited by clicking the "M" in the upper-left corner of the tooth chart. If you do not see dental conditions in the patient's treatment chart, use the Filters icon in the Treatment Chart section of the Patient ribbon bar to enable them.
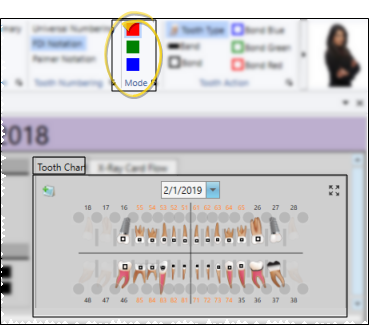
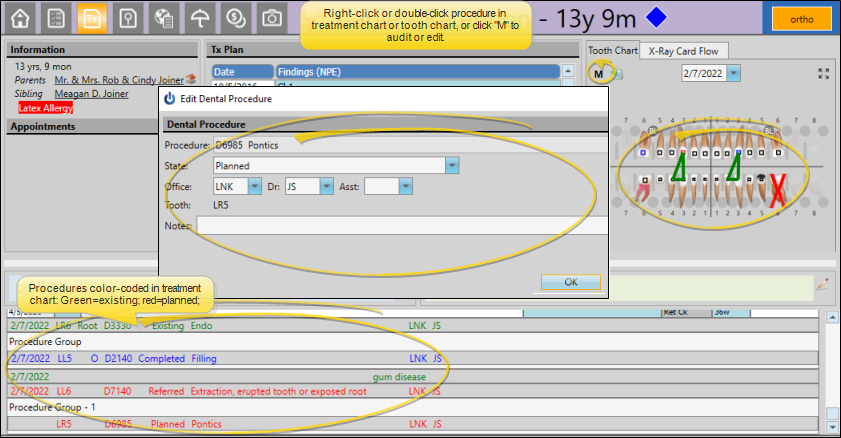
Procedure Mode Option - If you enable the Tooth Chart Dental Procedure Mode option in your Treatment Hub user options, you can select the mode you want to apply to procedures as you enter them into the tooth chart: Red = planned; green = existing; blue= completed. If the procedure mode option is disabled, procedures will be entered as "planned". (See "Treatment Hub User Options" for details.)
Applying Existing Procedures - Most dental procedures are applied to a patient as "planned," and processed as "completed" when you finish that treatment. However, you can also apply "existing" procedures to patients, for example, to provide a complete picture of treatments that occurred for patients that transfer into your practice, or when you first start using Edge
Once applied, the draw style you have set up in your Dental Procedures editor will appear in the tooth chart for procedures applied to individual teeth. You can also right-click a tooth to view the applied procedures and the tooth history. To view dental procedures applied to the whole mouth or other areas, hover over or click the "M" in the upper left corner of the tooth chart.
You can also use the Filters icon in the Treatment Chart section of the Patient ribbon bar to include dental procedures in the patient's treatment chart. Dental procedures are color-coded in the patient treatment chart: Red = planned, blue = completed, green = existing.
![]() Edit / Audit Dental Procedures
Edit / Audit Dental Procedures
After you apply dental procedures with the patient's tooth chart, or by linking them to an appointment, you generally use the treatment chart to edit them. You can double-click a procedure or procedure group header in the treatment chart section of the Treatment Hub window to access all editing and processing options. Or, right-click the procedure or procedure group heading and select Edit. In addition, you can edit dental procedures by clicking the "M" in the upper-left corner of the tooth chart. You can also right-click to access additional actions, including Completing the procedure, Adding, Moving, or Removing from a group, and Auditing the procedure (the Post Charge option happens automatically with the Edge Specialist module and does not function here.) If you do not see dental procedures in the patient's treatment chart, use the Filters icon in the Treatment Chart section of the Patient ribbon bar to enable them.
Time Limit - Once a dental procedure is flagged as "completed", you can edit its details only for the next 24 hours. After that, the details become permanent.
![]() Link Dental Procedures to Appointments
Link Dental Procedures to Appointments
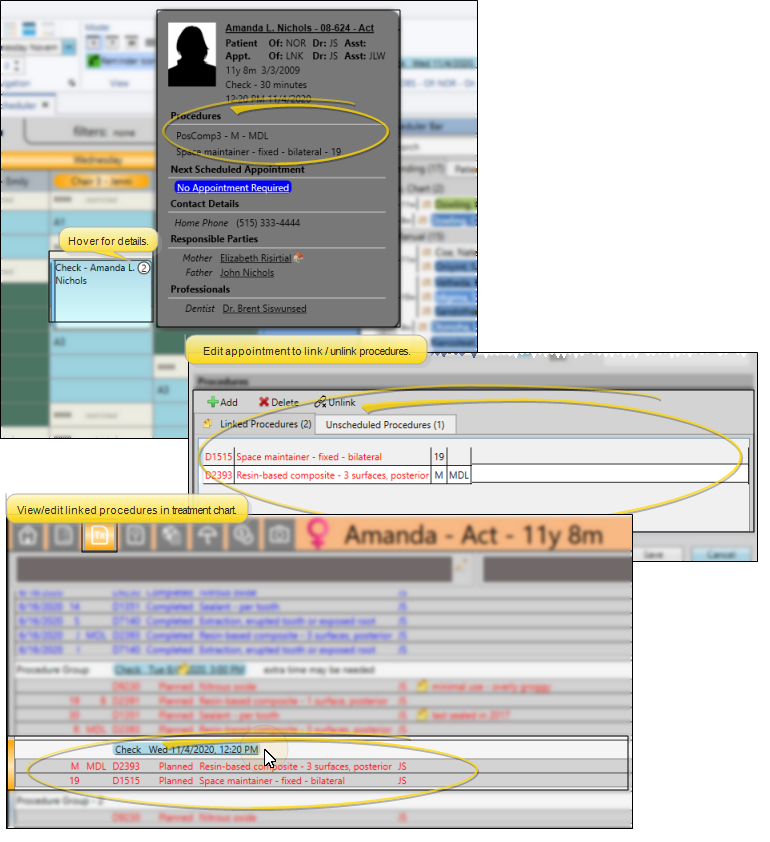
After applying planned dental procedures to a patient's tooth chart, you will, at some point, want to link them to appointments. You can do this in several ways: 1) As you schedule an appointment for the patient, 2) Editing the appointment in your Scheduler, or 3) Moving a procedure to or from an appointment procedure group in the patient's Treatment
When at least one dental procedure is linked to an appointment, the number of linked procedures appears on the appointment in your Scheduler. You can hover over the appointment to view the list of included procedures, or right-click and edit the appointment to see procedure details. In addition, linked procedures appear as a group, with the appointment date and time as the group header, in the patient's Treatment
![]() Apply / Update Extraction Request
Apply / Update Extraction Request
Right-click the tooth to work. Select the Extraction Request option. The procedure will be added to the tooth chart, along with the visual indicator you have set up in your Dental Procedures editor. If your treatment chart filter is set to display dental procedures, the procedure will appear among the patient's treatment chart records, in it's chronological order. To edit the procedure details, including changing the status, assigning a doctor, and entering notes, double-click the entry in the treatment chart.
Update Records - Remember to return to a patient's tooth chart to change the tooth status from Extraction Request to Extracted when the extraction has taken place.
Apply Extraction Requests with Elastics Templates - You can include common extraction requests in your elastics template library, and apply those templates, including the extraction requests, to patient tooth charts as needed. See "Tooth Chart Editor" for details.
Right-click the tooth, and select the Extracted condition. Or, right-click or double-click the entry in the treatment chart to edit the details and note that the extraction has been completed.
![]() Tooth Chart / Extraction Mail Merge Variables
Tooth Chart / Extraction Mail Merge Variables
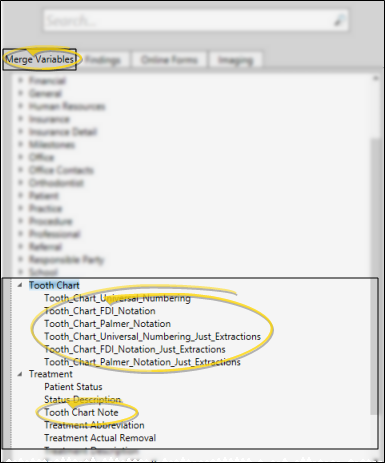
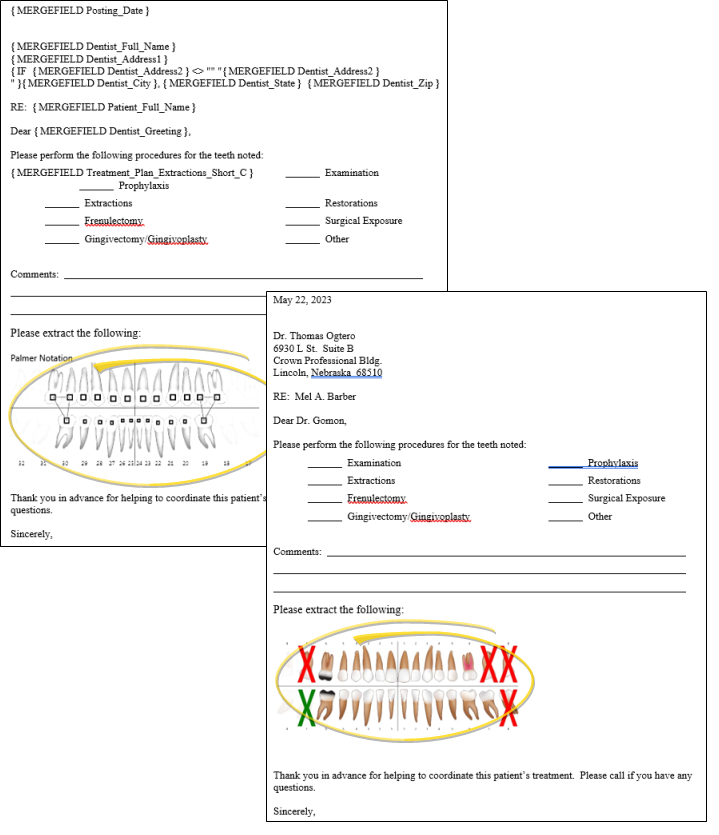
You can include a tooth chart variable in a mail merge document to include a graphical representation of your extraction requests in letters you send to a patient's dentist or other professional. You can choose from among several variables, specifying which numbering system to use, and whether to include just extraction requests or all tooth chart notations in the output. You can also include a tooth chart note variable to print the contents of the latest note in the document. See "Mail Merge Variables" for details.
Use the Extraction Request workflow trigger to activate a workflow whenever you apply the Extraction Request property to a patient's tooth chart.
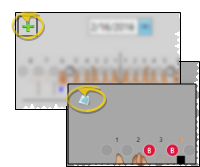
Click between teeth to add / remove spacers. You can then right-click the spacer to identify the type that was placed.
![]()
Add TAD (temporary anchorage device) placements and requests to a patient's tooth chart. You can also add TADs to elastics templates so they are added whenever that template is applied to the patient's tooth chart. The TAD icon appears at the base of the tooth wherever the device has been applied.
Apply / Remove TAD - You can either right-click the TAD circle and choose the TAD placement, TAD request, or extraction request to apply. Or, click the circle at the base of a tooth repeatedly to apply common TAD options.
Elastics Library Option - You can include TAD placements and requests, and extraction requests in your elastics libraries for quick application in your patient tooth charts. See "Tooth Chart Editor" for details.
Update Records - Remember to return to a patient's tooth chart to change the TAD status from a request to a placement when you receive confirmation that the procedure has taken place.
You can bond / debond individual teeth as needed, or select to bond / debond all teeth at once. The Bonded icon indicates teeth that are currently bonded. You can apply and remove the banding option to individual teeth as needed. The Banded icon indicates teeth that are currently banded.
![]() Bond / Debond Individual Teeth
Bond / Debond Individual Teeth
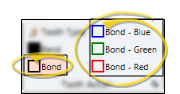
To apply or remove bonds for individual teeth, you can either enable Bond mode from the Tooth Action section of the Patient ribbon bar, selecting the bond color you wish to use, then click the tooth to work with. Or, right-click a tooth and select the Bonded option in the appropriate color.
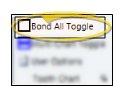
Select Bond All Toggle from the Tooth Chart section of the Patient ribbon bar to add or remove the bonds from all teeth.
![]() Band / Deband Individual Teeth
Band / Deband Individual Teeth
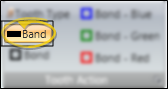
To apply or remove bands, you can either enable Band mode from the Tooth Action section of the Patient ribbon bar, then click the tooth to work with. Or, right-click a tooth and select the Banded option.
You can draw individual elastics onto the tooth chart as needed, or apply an entire elastics template to a tooth chart.
Set Up Elastics Types and Templates - Use the Tooth Chart editor to edit tooth names, as well as to set up the list of elastic types and elastics templates to use with your patient tooth charts. You also enable / disable the treatment chart / tooth chart integration with this
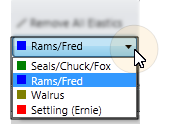
(Optional.) Select the elastics type to use from the Elastics section of the Patient ribbon bar.
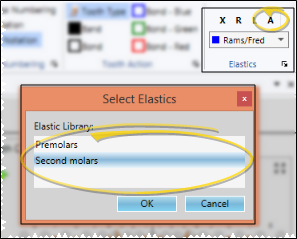
Select A from the Elastics section of the Patient ribbon bar. Then select the template to apply. The template is added to any elastics already in the patient's tooth chart. After applying a template, you can draw additional elastics as needed.
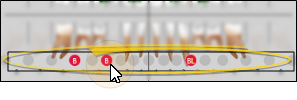
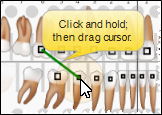
In the tooth chart, click and hold the first tooth you want to work with. Drag your cursor to the last tooth you want included in the group and release your mouse button. You can continue adding elastics to the tooth chart, selecting different elastic types whenever needed.
Click vs Drag Tooth Chart Actions - When you click and release a tooth, the tooth chart toggles the dentition stage. When you click and hold a tooth, you can then drag to add elastics.
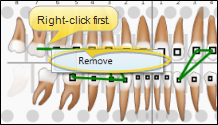
Right-click the elastics line you want to work with and select Remove.
Select X from the Elastics section of the Patient ribbon bar to clear all elastics from a patient's tooth chart.

Select R or L from the Elastics section of the Patient ribbon bar to clear all elastics from the right or left side of a patient's tooth chart, respectively.

Elastics appear as lines on the tooth chart, color-coded according to the name / color you selected.
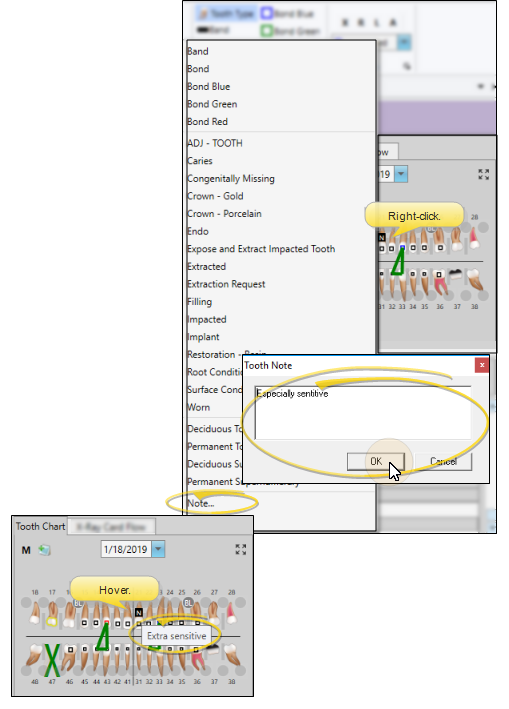
Right-click the tooth to work with and select the Note option. Then type the text of the note and click Ok. You can then hover over the Note icon that appears to see a tooltip of the note contents. Right-click again to edit the note contents.
Click the  Add a Note or Notes icon in the upper left corner of the tooth chart (depending on whether or not a note already exists) to add and review notes about this chart. You can include the Treatment > Tooth Chart Note variable in mail merge documents to print the latest note in the merge output.
Click  Save in your Quick Access toolbar or File ribbon bar (or press Ctrl+S on your keyboard) to save any changes you have made.

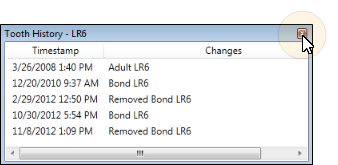
Right-click a tooth in the tooth chart, then select Tooth History (at the very bottom of the list) to pop up a window that lists the conditions applied to that tooth, along with the date and time the changes were made. Click the red X at the upper-right corner of the window to close the history. Tooth identification depends upon the currently selected numbering method.
![]() Add Tooth Chart Data to the Treatment Chart
Add Tooth Chart Data to the Treatment Chart
(Optional.) The tooth chart / treatment chart integration provides a way for you to add narrative text about tooth chart data directly into a patient's treatment chart in real time. To function, you need a treatment chart style column with either the Text Only or List and Text column type.
To include tooth chart data in your treatment chart records, first place your cursor in a Text Only or List and Text column of a new treatment chart record. Then, with that record still open, make any needed changes to the tooth chart, including adding and removing elastics. The tooth chart data will be translated into a narrative description in the active column of your treatment chart record. See "Treatment Chart Records" for details. (You can optionally turn this feature off. See "Tooth Chart Editor" for details.)
![]() Add Tooth Chart Data to Merge Letters
Add Tooth Chart Data to Merge Letters
You can include a tooth chart variable in a mail merge document to include a graphical representation of your extraction requests in letters you send to a patient's dentist or other professional. You can choose from among several variables, specifying which numbering system to use, and whether to include just extraction requests or all tooth chart notations in the output. You can also include a tooth chart note variable to print the contents of the latest note in the document. See "Mail Merge Variables" for details.