Create or edit a mail merge document.
Position your cursor where you want to place the image in your document.
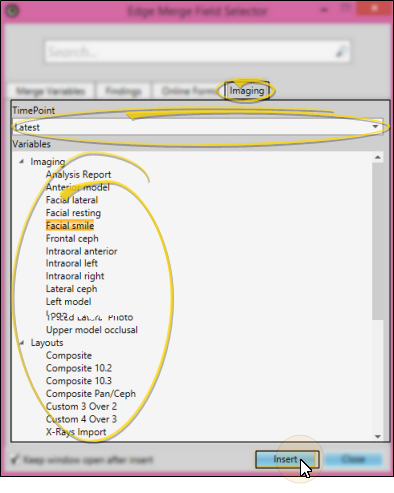
Choose format, image & timepoint![]() - Open the Add-In menu (if needed). Select the Edge Fields menu. Choose the Imaging variable category, then choose whether you want an individual image or a layout. You then select the specific image type and timepoint to merge. A box appears in your letter as a placeholder for the image. (If the image name variables do not match your imaging system, please contact Ortho2 for assistance.)
- Open the Add-In menu (if needed). Select the Edge Fields menu. Choose the Imaging variable category, then choose whether you want an individual image or a layout. You then select the specific image type and timepoint to merge. A box appears in your letter as a placeholder for the image. (If the image name variables do not match your imaging system, please contact Ortho2 for assistance.)
Position & Resize Image - You can click and drag the image box to the desired location. You can also hold down the Shift key, then click and drag the box handles to resize the image. (If you resize without holding the Shift key, your image proportions will become distorted.)We recommend identifying the image in the letter description (e.g. Dental Exam Notice with Facial Frontal Image ) to facilitate selecting appropriate letters.
Save & exit - Click the X in the upper right corner of the Word document window. As you exit, you have the opportunity to save the document.


