You can easily print an individual image, or the entire image layout displayed on your screen to any printer installed on your workstation, including "virtual" printers that save the output as a graphical file.
Get Started
Set up layout print options - Use the Print Orientation property of your imaging layouts to specify whether a layout will print in portrait or landscape mode. See "Set Up Image Layouts" for details.
Set up individual image print options - Format the Image Print Layout to specify how you want individual images to print. See "Set Up Image Layouts" for details.
How to Get Here
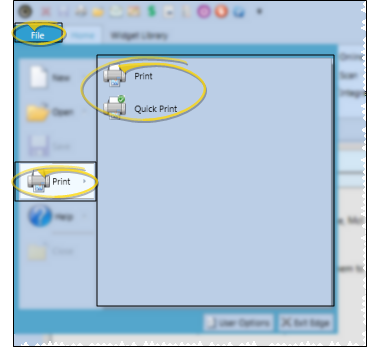
Print a layout - Open the layout you want to work with, then click Print from your Quick Access toolbar, then select the printing output options.
You can also initiate printing a layout from File toolbar, or by pressing Ctrl-P on your keyboard.
Print an individual image - Right-click the image you want to work with, and select Print. Then select the printing output options.
Use This Feature
Print output options - After initiating the print function for either a layout or an image, you can select the output options, including the printer to use, number of copies, and more.
Quick print - If you selected the Quick Print option from the Edge Imaging button, the output is immediately sent to your default imaging printer. See "Set Up Imaging User & Machine Options" for details about selecting a default printer to use for images.
Notice!
Printing image comparisons - When you initiate the Print function while comparing images, all images will appear on one page. See "Compare Images" for details.
 Print from your Quick Access toolbar, then select the printing output options.
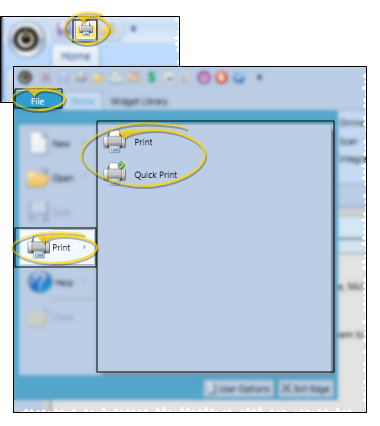

 Print function while comparing images, all images will appear on one page.


