Send an Instant Message
Use your Messaging feature to send instant messages to employees and other professionals that provide care for your patients.
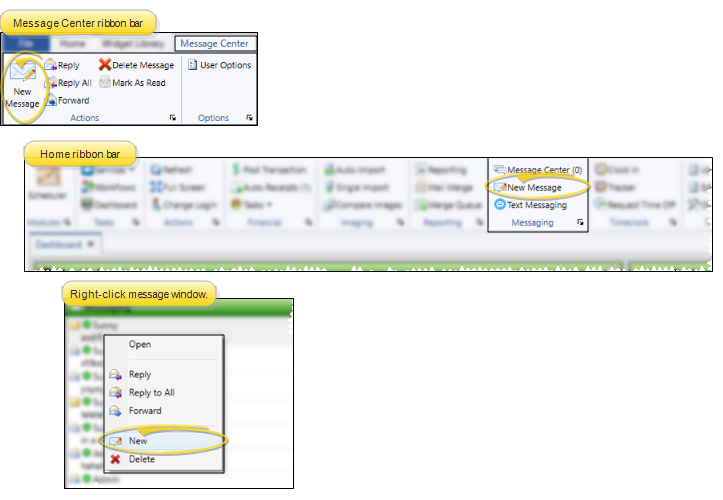
Right-click anywhere in the Message Center or Messaging widget window and select  New Message. Or, choose New Message from the Message Center or Home ribbon bar. Then, compose and send the message. (See "Send an Instant Message" for details.)
Quick Access toolbar - You can also open this feature from the Quick Access toolbar at the top of your Edge Cloud system window.
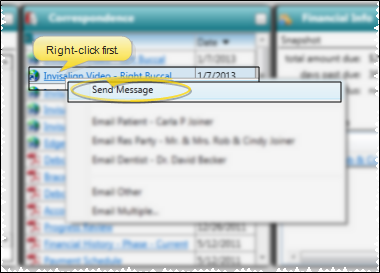
![]() Correspondence History Document - Right-click a document in the patient correspondence history to send a message that includes links to both the patient folder, and the selected document. See "Patient Correspondence History" for details.
Correspondence History Document - Right-click a document in the patient correspondence history to send a message that includes links to both the patient folder, and the selected document. See "Patient Correspondence History" for details.
You may choose message recipients from among your Edge Cloud operators, as well as from the list of professionals that use your Edge Portal Premium app.
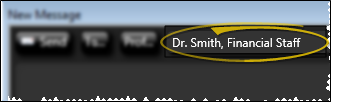
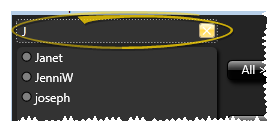
![]() Type a Name - You can type all or a portion of a person's name, as well as all or a portion of your messaging group names in the recipient box at the top of the New Message window, separated by commas. When finished, press the Tab key. If no matching name can be found, the name is followed by a question mark.
Type a Name - You can type all or a portion of a person's name, as well as all or a portion of your messaging group names in the recipient box at the top of the New Message window, separated by commas. When finished, press the Tab key. If no matching name can be found, the name is followed by a question mark.
![]() Select From a List - Click To... at the top of the New Message window, then choose the employees and messaging groups you want to receive your message.
Select From a List - Click To... at the top of the New Message window, then choose the employees and messaging groups you want to receive your message.
Employee Accounts - Employees must have an Edge Cloud operator account to be available for messaging. You can optionally prevent sending messages to certain operator accounts (such as a general Patient Sign-In account). See "Operator Editor" for details.
![]() Open Recipient List - Click To... at the top of the New Message window to open the recipient list.
Open Recipient List - Click To... at the top of the New Message window to open the recipient list.

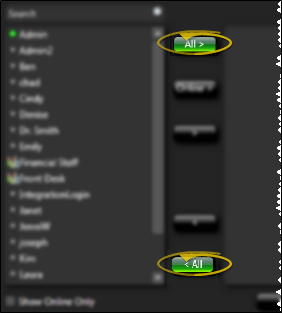
![]() Add / Remove Names and Groups - Select employee and group names in the list at the left, then use the arrows to add and remove them from your recipient list, at the right of the window. Message group names are preceded by a special icon. You can hover over a group name in either the available staff or recipient list to see the individual staff members that are included in the group. When you send the message, each staff member that is included in selected groups will receive the message. (See more about message groups below.)
Add / Remove Names and Groups - Select employee and group names in the list at the left, then use the arrows to add and remove them from your recipient list, at the right of the window. Message group names are preceded by a special icon. You can hover over a group name in either the available staff or recipient list to see the individual staff members that are included in the group. When you send the message, each staff member that is included in selected groups will receive the message. (See more about message groups below.)
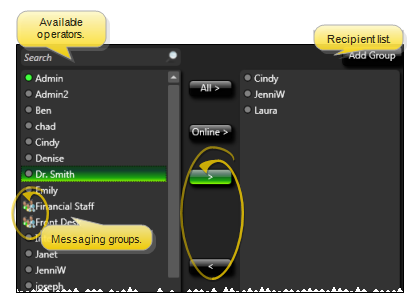
Show Online Only Option - Enable the Show Online Only option at the bottom of the window to include only operators currently logged into Edge Cloud in the list. If this option is disabled, online staff members will be indicated by a lit button beside their names.

Search For a Name - Type all or a portion of an operator name in the Search box to narrow the list of available names. Click X to return to the entire list.
Add / Remove All - Use the All buttons to add or remove all names from your recipient list.
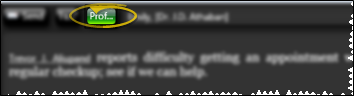
![]() Select Professional Recipients - Click Prof... at the top of the New Message window, and use Fast Find to search for the professional you wish to include as a message recipient.
Select Professional Recipients - Click Prof... at the top of the New Message window, and use Fast Find to search for the professional you wish to include as a message recipient.
Professionals - To send a professional a message via Edge Cloud Messaging, the professional record must have a valid email address, and that email address must be registered to use your Edge Portal Premium app to retrieve the message.When you select a professional to receive a message you send via Messaging, the processional can optionally receive a notice of the message at the email address in the professional record; the professional must then log into Edge Portal to retrieve the complete message text. You may choose to have multiple messages condensed into a digest, to be emailed to the professional at one time, instead of many times throughout the day. In addition, messages received through Edge Portal are saved in the correspondence history. If a patient link was included, the message is saved in the patient's correspondence history as well. Use your Edge Portal settings to enable / disable the professional message options.
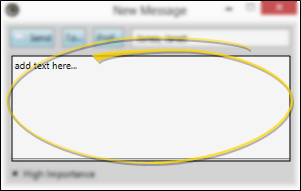
Insert your message text and optional patient folder links in the message body section of the New Message window, and choose whether the message is of high importance.
Add Text - In addition to typing the message body, you can cut, copy, and paste You can cut, copy and paste to add and edit text and/or images to many areas of your system using standard keyboard shortcuts ( Ctrl+X , Ctrl+C , Ctrl+V , respectively). Or, you can often right-click the field or image you are working with and select the action from a menu. In many cases, Ctrl+A selects all available text or images, ready for you to cut or copy, Ctrl+Z performs an Undo of the last action, and Ctrl+Y performs a redo of the last action. text, and add bold (Ctrl-B), italic (Ctrl-I) and underline (Ctrl-U) properties to selected text for emphasis.
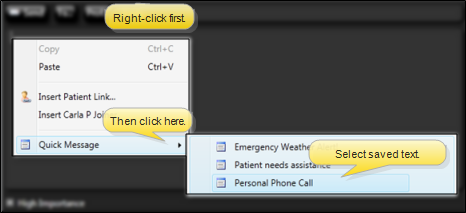
Add Quick Message - Right-click where you would like to insert text you have previously saved, and select the Quick Message option. Then select from your Quick Message list. (See "Messaging User Options" for details about creating and maintaining the list.)
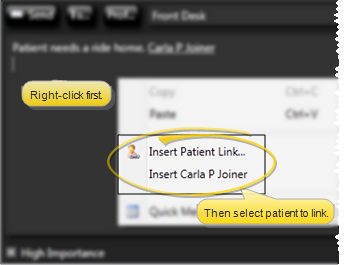
Link Patient Folder - Right-click where you would like to include a link to a patient folder, and select Link Patient. If a patient record is already active, that patient's information will be loaded automatically. Otherwise, you use Fast Find (either typing information or swiping a registered reward card) to search for the patient to work with. After you send the message, the recipient can click the link to open the patient folder. (The Send Message workflow activity automatically inserts a patient link at the top of the message. See "Workflow Editor" for details.) If you send a message with a patient link to a professional, the message is saved in both the professional and patient correspondence histories.
Spell Check - Right-click a red-underlined word in your message to correct your spelling, or to add the unrecognized word to your Edge Cloud dictionary. (See "Edge Cloud Dictionary Editor" for detailsabout maintaining your unique dictionaries.)
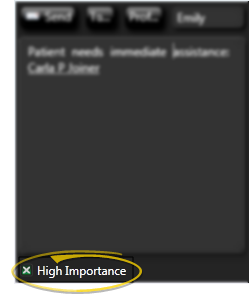
High Importance Flag - Enable the High Importance option to flag this message as high priority. Your User Options determine whether high importance is enabled or disabled by default. If you receive a messaged flagged with  High Importance while you are logged into Edge Cloud, or if you have an unread high importance message when you first log in, the message will pop onto the top of your Edge Cloud screen so you can take care of it right away.
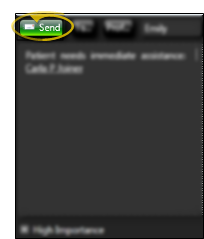
When you have finished entering your message, click Send (or press Alt-S or Ctrl-Enter on your keyboard). The message will appear in the Message Center of all selected recipients, and an Edge Portal link will be sent via email to all professional recipients. In addition, if the high importance option was enabled, the message will pop onto the recipient's screen, whether or not the recipient has their Message Center open. If high importance is disabled, the recipient will be notified a message has been received, but the message will not pop onto the screen.
Automate Messages - Use the Send Message workflow activity to send an Edge Cloud Messaging message, along with a patient link, to staff members and / or professionals. See "Workflow Activities" for details.
Automated Prize Request Messages - When a patient requests a prize from the patient reward Prize Selector, your system can automatically send a message to one or more