Workflow Editor
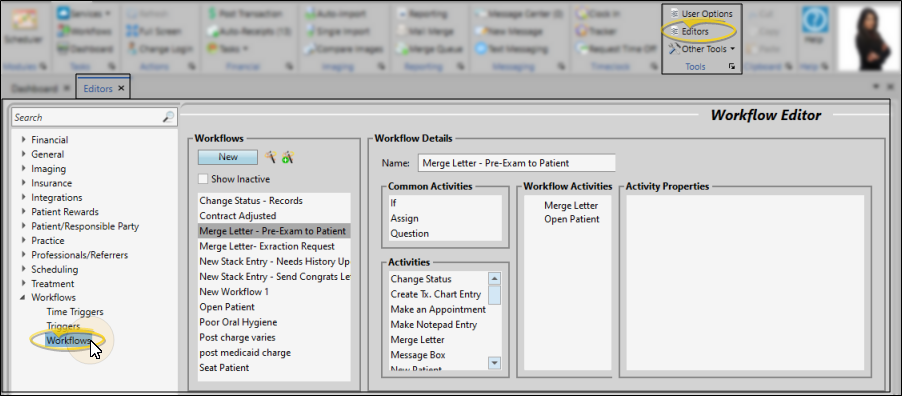
Use the Workflows editor to create and edit your workflows. You can use workflows to automate Edge Cloud actions whenever something happens in your Edge Cloud system. For example, when an appointment is processed as kept, you can trigger a workflow that creates a treatment chart record. Depending on the type of workflow, you may be prompted to complete an action before you can continue with another task.
Select Editors from the Tools section of the Home ribbon bar. Then, from the Workflows section, open the Workflows editor. (You can also use the Search field to look for the editor you want to work with.)
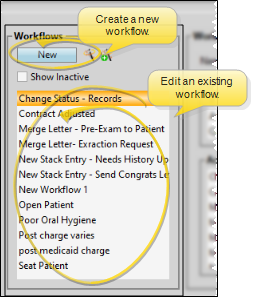
Click New at the top of the Workflows list, or use the  Workflow Wizard icon to create a new workflow. Or, select an existing workflow from the list. Once you create a record, you cannot delete it. You can, however, flag it Inactive. Records you flag as Inactive are not available for general use, but they remain in your system for reporting and other data collection needs. In addition, you can toggle records back to Active whenever needed.
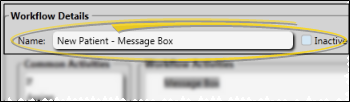
Enter a descriptive name for your workflow, so you know its purpose as you assign it to triggers. When you use the Workflow Wizard to create a workflow, the name defaults to the name of the activity you chose (described below.) Once you create a record, you cannot delete it. You can, however, flag it Inactive. Records you flag as Inactive are not available for general use, but they remain in your system for reporting and other data collection needs. In addition, you can toggle records back to Active whenever needed.
Workflow activities are the actions you want to happen when the workflow is triggered. You define how you want that action to happen with the associated properties. A workflow can be as simple as a single-step activity, or it can contain multiple activities.
 Add an Activity to a Workflow
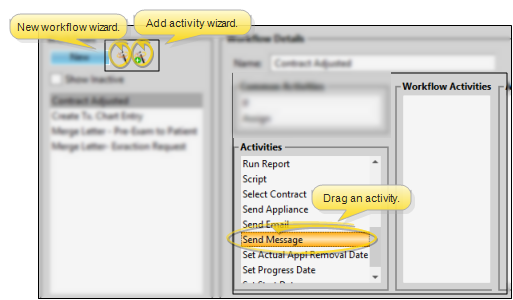
When you use the Workflow Wizard icon to create a new workflow, you are immediately prompted to select the activity you want to trigger. You can also add activities to a workflow by either using the  Add Activity wizard, or dragging items from the Activities list into the Workflow Activities section of the window.
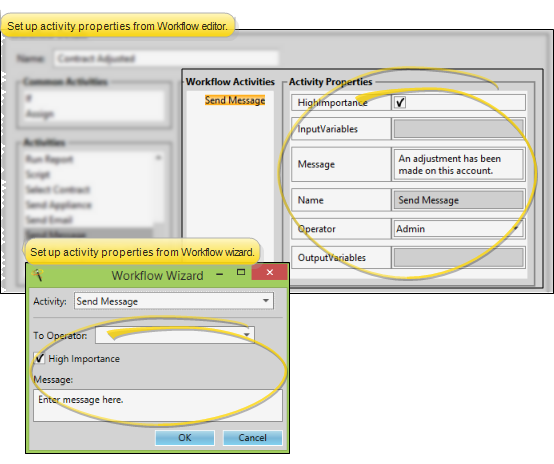
Set Up Activity Properties
The activity properties specify how you want the activity to function when the workflow is run. Most activity properties can be set up when you first add the activity to a workflow via the Wizard. You can also edit activity properties from the Activity Properties section of the Workflow editor window. The properties available depend on the type of activity you are working with. While you can change many of the properties as needed, certain properties that are required for the activity to function are set up by your Edge Cloud system, and cannot be changed by you.
Re-Order Activities
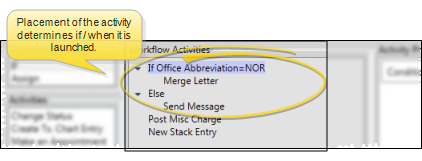
When a workflow is triggered, the activities will be launched in the order they appear in the Workflow Activities list. You can drag the activities to re-order them as needed. This is especially important in more complex workflows that contain conditional elements, described below.
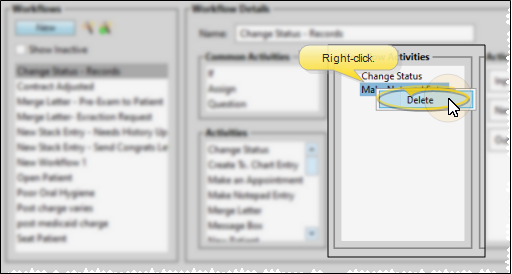
Remove an Activity
Right-click an item in the Workflow Activities list, and select Delete (or, click the activity and press the Delete key on your keyboard). You cannot delete workflows themselves, but you can flag workflows you no longer use as Inactive.
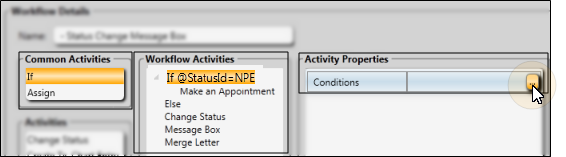
You can use the "If" element of the Workflow editor to evaluate patient data as you run a workflow, to determine how the workflow activities will function when the workflow is triggered for a specific patient. For example, a workflow can trigger a different word processing document, depending on whether a patient is at least 18 years old. See "Workflow Conditional "If" Elements" for details.
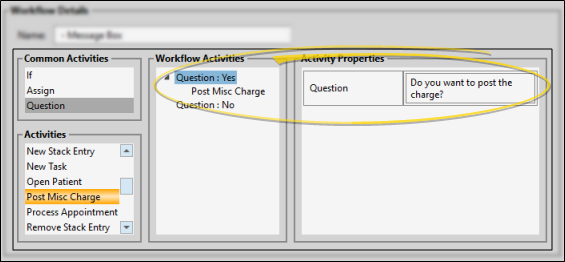
You can use the "Question" element of the Workflow editor to ask the user a yes/no question when the workflow runs. The workflow can then trigger additional activities depending on whether you respond "yes" or "no". This is particularly useful for directing workflow activities when there is no patient data you can evaluate to direct the appropriate workflow activity. See "Workflow Yes/No Question Element" for details.
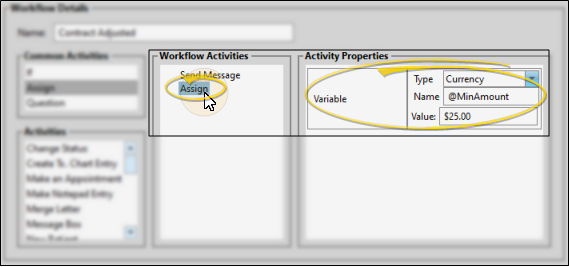
You can use the "Assign" element of the Workflow editor to create new variables, and assign values, or contents, to those variables to use within a specific workflow activity. Most often, "Assign" elements are used in conjunction with "If" conditional statements to evaluate patient data and assign an appropriate value according to the results of the evaluation. See "Use "Assign" to Create Workflow Variables" for details.
Click  Save in your Quick Access toolbar or File ribbon bar (or press Ctrl+S on your keyboard) to save any changes you have made.