The Transaction Summary
This report defines a transaction date as the date of the Transaction report on which it was included. Although it is possible to post-date or back-date transactions, they always appear on the next Transaction report. This allows you to reconcile specific Transaction reports with your Transaction Summary.
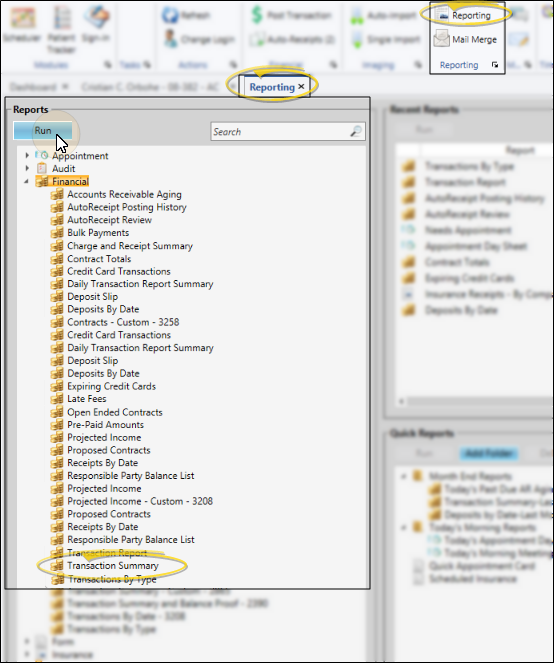
Home Ribbon Bar -  Reporting > Financial > Transaction Summary > Run. (You can also search for the report you want to work with.)
Click  Reporting from the Home ribbon bar.

Expand the Financial reports section (if needed), and select the Transaction Summary report. Then click Run.

Report Settings - Select the options to use for choosing records and generating this report or form. Choose carefully, as your selections will affect which patients are included in the report.
First & Last Report Dates or Numbers - Enter the first and last transaction dates to include, or specify a range of Transaction report numbers to include.
Office - Choose to include only the records for a specific office, or include the records for all office locations in your practice.
Orthodontist - Choose to include only the records for a specific orthodontist, or include the records for All orthodontists in your practice.
View Results - If needed, click View at the top of the report settings panel to view the results on your screen. When you run a report or form from your Recent Report list, or when you run a Quick Report, the initial results are sent to your screen immediately, with one exception: A Quick Report that has the  Print Only option enabled will not show your results on the screen at all, but prompt you for the printer to use.
Expand / Collapse Details - Click an expand / collapse icon beside a report heading to view / hide patient details.View individual transactions - While viewing the report, you can expand a section to see all the individual transactions that comprise the total amount reported.
Open Patient Folder - While viewing the report, you can click a patient name that appears on the report to open that patient folder.
Manage Options and Output - With the results on your screen, you can choose different report settings from the left side of the screen and click View again to obtain different results. In addition, you can manage the output with the toolbar at the top of the report window. See "Navigate, Print, & Export Report Results" for details. In addition, reports can either be printed, or exported as an image or PDF file.
Ortho2.com │1107 Buckeye Avenue │ Ames, Iowa 50010 │ Sales: (800) 678-4644 │ Support: (800) 346-4504 │ Contact Us
Remote Support │Email Support │New Customer Care │ Online Help Ver. 8/3/2015