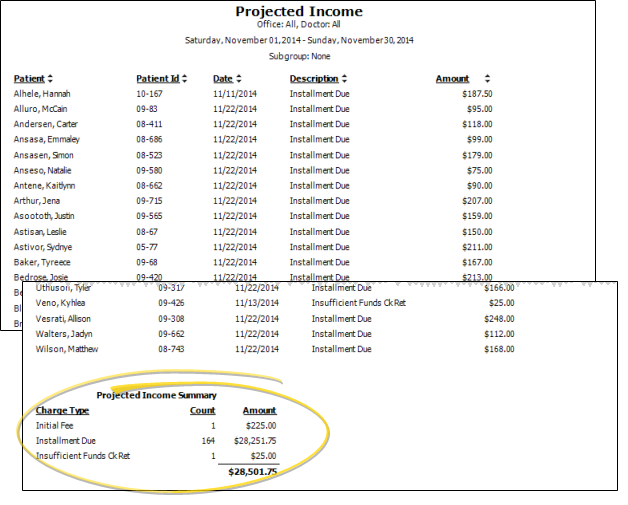
Run the Projected Income report to review all charge transactions for any range of dates you specify. It is intended to be used with a future range of dates to show contract charges (i.e. initial fees and period fees) that are on the books but not yet due. You can generate a detailed report showing exactly which account each charge belongs to, or just a summary with totals by type of charge.
Home Ribbon Bar -  Reporting > Financial > Projected Income > Run. (You can also search for the report you want to work with.)
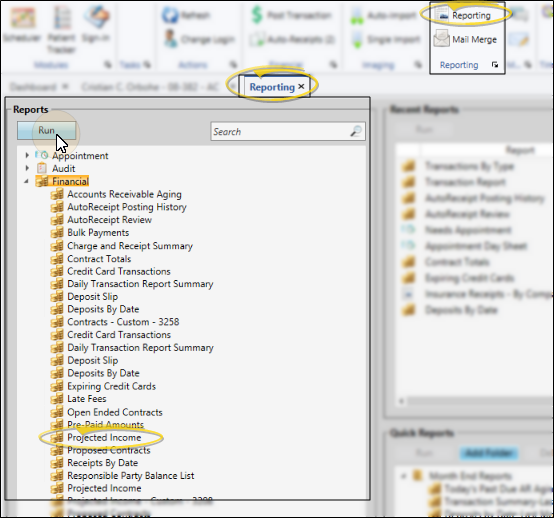
Click Reporting from the Home ribbon bar.
Expand the Financial reports section (if needed), and select the Projected Income report. Then click Run.
Select the options to use for choosing records and generating this report or form. Choose carefully, as your selections will affect which patients are included in the report.

Start / End Dates - Choose the range of dates to include on this report, or select a single date for both the Start Date and End Date fields to run the report for an individual date. You can type a date in the fields, or click the
Office - Choose to include only the records for a specific office, or include the records for all office locations in your practice.
Orthodontist - Choose to include only the records for a specific orthodontist, or include the records for All orthodontists in your practice.
![]() Show
the Summary Only - Enable this option to generate the report as a summary of anticipated
charges. Otherwise, the details of each charge are included on the report, and the summary is at the end.
Show
the Summary Only - Enable this option to generate the report as a summary of anticipated
charges. Otherwise, the details of each charge are included on the report, and the summary is at the end.
Subgroup - Select the subgroup to use when generating this report or form. Only records that fit your selected subgroup as well as all other report parameters will be included.
View Results - If needed, click View at the top of the report settings panel to view the results on your screen. When you run a report or form from your Recent Report list, or when you run a Quick Report, the initial results are sent to your screen immediately, with one exception: A Quick Report that has the  Print Only option enabled will not show your results on the screen at all, but prompt you for the printer to use.
Open Patient Folder - While viewing the report, you can click a patient name that appears on the report to open that patient folder.
Use Arrows to Re-sort Report - Click the up / down arrow to the right of a column heading to re-sort the report according to that column’s criteria. Click the arrows a second time to sort that column in reverse order, or click the arrows beside a different column to change the sort order again.
Manage Options and Output - With the results on your screen, you can choose different report settings from the left side of the screen and click View again to obtain different results. In addition, you can manage the output with the toolbar at the top of the report window. See "Navigate, Print, & Export Report Results" for details. In addition, reports can either be printed, or exported as an image or PDF file.
 │
│
Ortho2.com │1107 Buckeye Avenue │ Ames, Iowa 50010 │ Sales: (800) 678-4644 │ Support: (800) 346-4504 │ Contact Us
Remote Support │Email Support │New Customer Care │ Online Help Ver. 8/3/2015


