Use the Style Editor to define which information you want to catalog as you create treatment chart and treatment plan records. You may create as many styles as you need to describe the information needed at all stages of a patient's treatment.
Create response lists - Use the List Editor to create pre-defined response lists. You can then assign the lists to columns of your treatment chart and treatment plan styles to make data entry convenient and consistent.See "Set Up Treatment Chart & Plan Lists" for details.
Home ribbon bar > Editors > Treatment > Treatment Chart Style or Treatment Plan Style. (You can also search for the editor you want to work with.) for the editor you want to work with.)
The setup for treatment chart styles and treatment plan styles is very similar; be sure you have accessed the appropriate Style Editor!
Choose style to work with - Your list of existing styles appears at the left. Click the style to work with. The details for that style appear at the bottom of the window.
Display active / inactive styles - You can choose whether to include inactive styles in your list. 
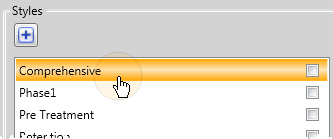
icon at the top of the window
Create new style - Type a name for in the Create New Style section of the window and click Add. You can then edit your new style to complete the details.
Style details - Styles are made up of any number of columns, each containing a specific type of information. However, certain information is common to all columns across the style.
Name - Enter a name that distinguishes this style from all other styles.
Toggle inactive flag - Once created, you cannot delete a style. You can, however, enable the 
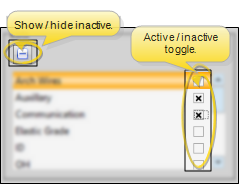
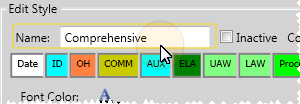
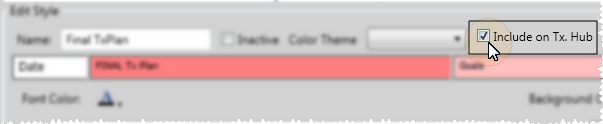
Inactive flag if you no longer need to use a style.
Include on Tx Hub option - (Treatment plan styles only.) Enable this option to display the contents of this style on the patient's treatment hub as well as the treatment plan. Styles that do not have this option enabled will appear only in the treatment plan.
Color theme - Select default colors for your style. Even if you choose a color theme, you may modify the colors of individual columns as needed.
Add a new column - Click New Column
Re-order columns - Click and drag a column to a new location in the style.
Remove a column -
Column details - You decide how each column looks, and how information will be entered into each column of the style. Click the column you want to work with, then change the properties as needed.
Column heading - Click in the column you want to change,
Colors & fonts - Click the column you want to work with, then change the color and font properties, and the emphasis options. As you make changes, the example will change to reflect your new settings.
Rich text option - After you create a treatment chart/plan record with this style, you might want to add emphasis to certain text. When the Rich Text option is enabled, you can apply formatting just to text that you select. When this option is disabled, any formatting changes affect the text of the entire column.
Column type / assigned list - Each column in your style can require a different type of input. For example, you can type text into some column types, while others require that you select a response from a list or choose an appointment procedure.
The Text Only column type requires that you type (or copy & paste) text into the column. In addition, if you edit a patient's tooth chart while a Text Only or List and Text treatment chart column is active,
The List Only column type requires that you select a response from an assigned list. You cannot edit the response. (See "Set Up Treatment Chart & Plan Lists" for details)
When the Text Search option
is enabled for a list, you can begin typing a list response, and your cursor will jump to the response that begins with your typed text.
Text Search is disabled, your list responses will be numbered, and you can type a number to jump to the response you want.
When the Auto Complete option is enabled for a list, you can press the Tab key on your keyboard to add the entirety of the currently selected response to the treatment chart/plan record. If
Auto Complete is disabled, you must click the response to add the entire response text to the record.
The List and Text column type provides for both selecting from an assigned list, and/or typing text. You can select multiple responses from the list by pressing the space bar between responses. You can edit the text of the list responses, as well as add additional text as needed. (See "Set Up Treatment Chart & Plan Lists" for details)
In addition, if you edit a patient's tooth chart while a Text Only or List and Text treatment chart column is active,
When the Text Search option
is enabled for a list, you can begin typing a list response, and your cursor will jump to the response that begins with your typed text.
Text Search is disabled, your list responses will be numbered, and you can type a number to jump to the response you want.
When the Auto Complete option is enabled for a list, you can press the Tab key on your keyboard to add the entirety of the currently selected response to the treatment chart/plan record. If
Auto Complete is disabled, you must click the response to add the entire response text to the record.
The Procedure List type requires that you select a single response from
Note that Text Search
Save Changes Click
Save in your Quick Access toolbar or File ribbon bar (or press Ctrl+S on your keyboard) to save any changes you have made.
Tooth chart integration - The tooth chart / treatment chart integration provides a way for you to add narrative text to a patient's treatment chart as you edit a patient tooth chart. Simply add a new record to a patient's treatment chart, and place your cursor in a text or list and text column. Then enter data into the tooth chart. The tooth chart data will be translated into a narrative description in the active column of your treatment chart record.. Therefore, you may wish to include at least one column in a treatment chart style that anticipates tooth chart data. See "View & Edit Tooth Chart" for details.
Needs appointment integration - When a treatment chart style includes both a column that requires a response from a list that has the Next Appt Time
option enabled, and a column that requires a Procedure response, the information will automatically transfer to your Needs Appointment List.
Ortho2.com │1107 Buckeye Avenue │ Ames, Iowa 50010 │ Sales: (800) 678-4644 │ Support: (800) 346-4504 │ Contact Us
Remote Support │Email Support │New Customer Care │ Online Help Ver. 8/3/2015