Send Quick Email Messages
Use Quick Message to send a message to any email address you have stored in Edge Cloud with a simple click. This opens your email editor with that address as the recipient.
Edge Portal Settings - You may use your Edge Portal settings to choose to capture any outgoing emails or attachments sent to a professional and store them in Edge Portal. Instead of receiving an email with sensitive patient information the professional receives a notification to log into Edge Portal to retrieve the message and any attachments. This option can be enabled in the Options page of the Office Edge Portal.
Automate Emails - Use the Send Email workflow activity to open the email dialog for patient. You can optionally provide default subject and body text, or leave these fields blank and fill them in when the workflow is triggered. See "Workflow Activities" for details.
-
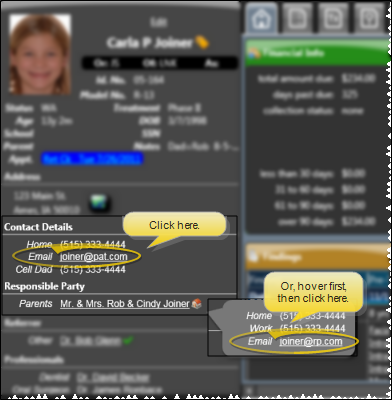
 Open an Email Window - You can click any email link in Edge Cloud to open the Quick Message email window. You might need to hover over a name to first pop up the contact information, then click the email address. Email addresses are found in many places throughout your system.
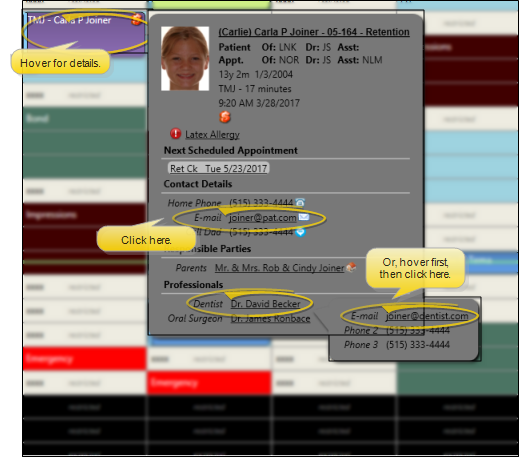
Patient Information Panel - Click the patient email address, or hover over a responsible party name. When the contact information pops up, you can click on that email address as well. (See "Patient Information Panel" for details.)
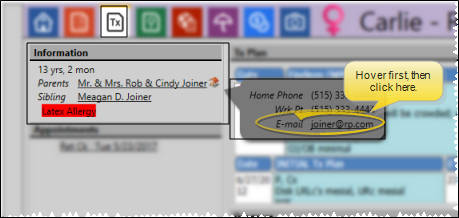
Treatment Hub Page - Hover over a responsible party name at the top of the Treatment Hub window. When the contact information pops up, you can click on an email address. (See "Treatment Hub" for details.)
Scheduler - Hover over an appointment to pop up the contact information. You can then click the patient's email address, or hover over a responsible party or professional name to pop up that contact's information. Then select the email address. (See "Your Scheduler" for details.)
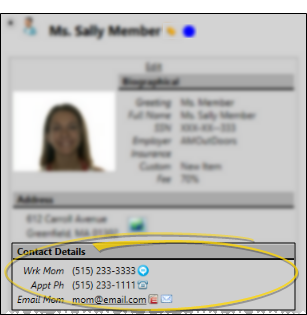
Responsible Party or Professional Page - While viewing Responsible Party or Professional information, click the email address in the Contact Details section of the window to initiate a quick message.
-
Select History Category -Choose the History Category to assign to your message. (See "History Categories Editor" for details about your category descriptions.)
-
Add and Edit Recipients - The Quick Message feature automatically inserts the email address that you clicked as your message recipient, but you can change that address and / or add other addresses as needed.
-
Type or Paste Text - You can type the text of the message in the body of the email, or copy and paste information from other areas of the patient folder, such as the treatment chart or notepad, into the email.
-
Copy Image to Email Body - Use the Edge Imaging copy feature to insert patient images directly into the body of your email message.into your message. See "Copy a Patient Image / Layout to the Clipboard" for details.
Attach Images Option - To send patient images as attachments instead of inserting them into the body of the message, you can use the Edge Imaging Email Images feature instead of the Quick Message feature. See "Email Patient Images & Layouts" for details.
-
Send and Track Message - Click Send to send your message to the email addresses you have chosen. A record of the message is saved in the correspondence history of each person whose email address you included as a recipient.