Schedule Appointments Manually
You can double-click an appointment time in your Scheduler to manually schedule a patient appointment.
Watch the movie. (A valid Ortho2 customer login is required to run video tutorials, webinars, and training programs.)
Scheduling Procedure Groups / Chains![]() - You must use the Smart Scheduler to schedule procedure groups or chains: Otherwise, you must schedule each appointment separately.
- You must use the Smart Scheduler to schedule procedure groups or chains: Otherwise, you must schedule each appointment separately.
![]() Manually Schedule an Appointment
Manually Schedule an Appointment
-
 Open Your Scheduler - You can open this feature in multiple ways: Use the method that's most convenient for you.
You can open this feature in multiple ways: Use the method that's most convenient for you.
Home ribbon bar or Quick Access toolbar
Clicking the
 Scheduler icon from either the Home ribbon bar or your Quick Access toolbar while a Scheduler session is already active can either bring the open Scheduler tab to the front of your Edge Cloud window, or open another Scheduler tab. See "Scheduler User Options" for details about setting up this option.
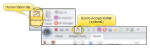
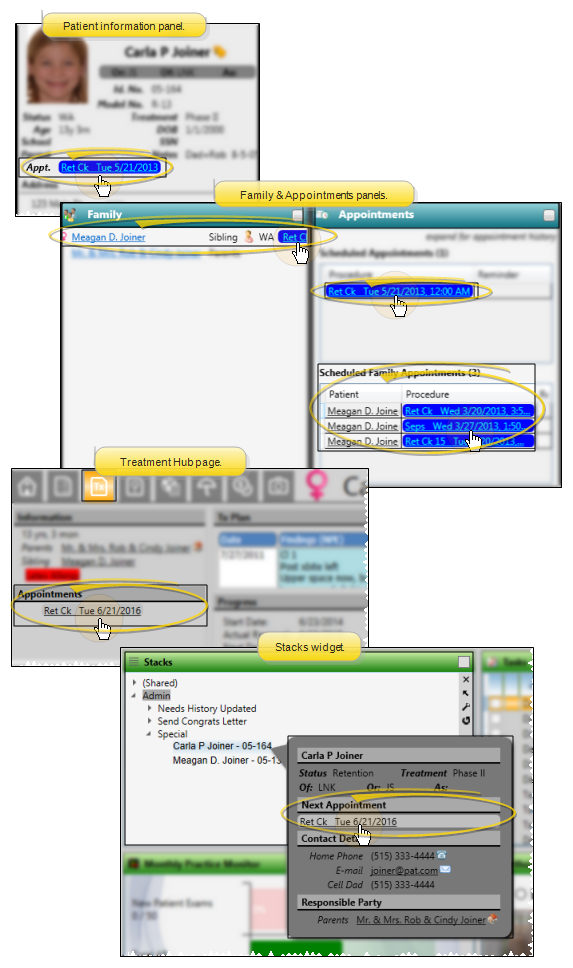
You can open your Scheduler to a specific appointment by clicking the appointment link wherever it appears in the patient folder, such as on the Patient Information Panel, the Family panel, or the Appointments panel of the patient folder Home page, on the Treatment
Arranging Multiple Scheduler Tabs - If you have multiple Scheduler tabs open, clicking a patient appointment link will bring the left-most tab to the front of your Edge Cloud window. Note that before you click the link, you can reorder your tabs by simply dragging them into place, thus selecting which Scheduler tab you want to work with. See "Scheduler User Options" for details about enabling/disabling the multiple Scheduler option.

-
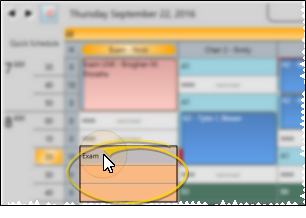
Select Appointment and Patient - Double-click the appointment slot you want to work with. If a patient record is already active, that patient's information will be loaded automatically. Otherwise, you use Fast Find (either typing information or swiping a registered reward card) to search for the patient to work with.
-
Review Warnings and Notices - You may see one or more warning or notice as you schedule patient appointments. Be sure to review each message, and respond appropriately, to continue.
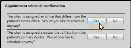
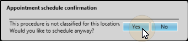
Multiple Appointment Warning - If you attempt to appoint the same patient twice in a row, you are notified of the event and must confirm your action to continue scheduling the appointment. This feature helps prevent accidental duplicate scheduling.
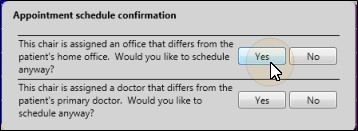
Doctor, Office, Assistant Conflicts - If this appointment is being scheduled to a grid cell that is assigned to a different doctor, office, or assistant than those in the patient folder, you must confirm you action before continuing.
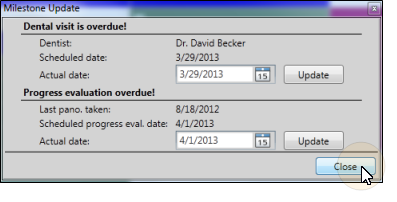
Milestone Reminders -

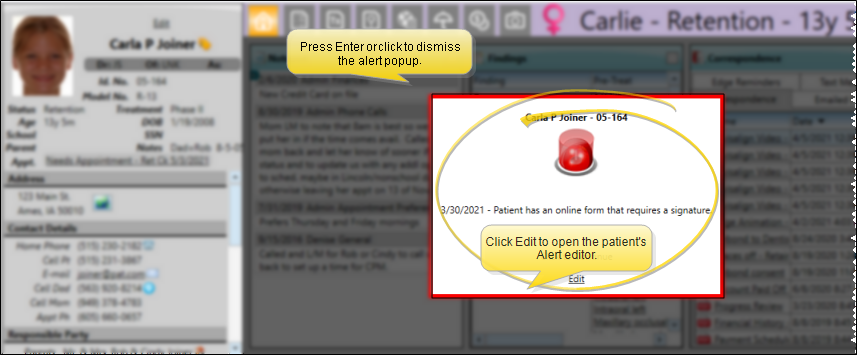
Alert Stop - If the patient has an alert trigger enabled for this feature, the Alert Stop pop-up window will appear when you initiate this feature for the patient. Review the alert information, then either press Enter on your keyboard, or click the box to continue. You can also click the Edit link to open the Alert editor for that patient.
-
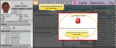
Review Patient and Family Information - Review this patient's appointment compliance and detailed appointment history, as well as any appointments that family members currently have scheduled at your office. In addition, any visual tags applied to the patient folder appear at the top of the window for your reference. Click a header to expand that section.
Patient Info - Click a header to expand the information you want to see. Any applied visual tags (a blue circle in our example) always appear beside the "Patient Info" header.

Patient Compliance - Click the patient name header to review how well this patient complies with appointments at your office. (You must use the

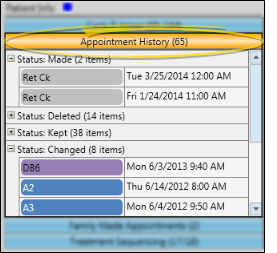
Appointment History - Review currently scheduled appointments, as well as the history of appointments this patient has kept, missed, and changed.

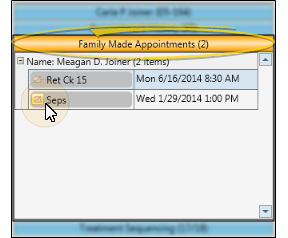
Family Made Appointments - Review any appointments family members currently have scheduled at your office. This feature is useful for parents that want to schedule multiple appointments on the same day.

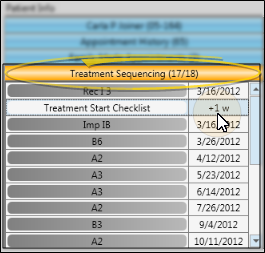
Treatment Sequence Progress - You can review a patient's treatment sequence while scheduling an appointment. This feature helps you stay on the proposed course of treatment with every appointment. See "Treatment Sequence" for details.

-
Confirm Appointment Details - After finding the appointment time slot for a patient, and responding to any alerts and reminders, the Confirm Appointment Details window opens. You can then review and change certain appointment details, and process previously scheduled appointments to complete the scheduling process.
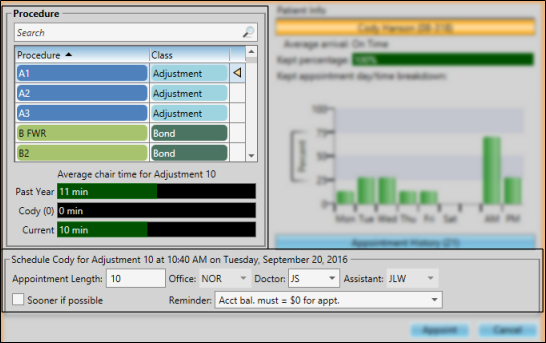 Procedure - To find the
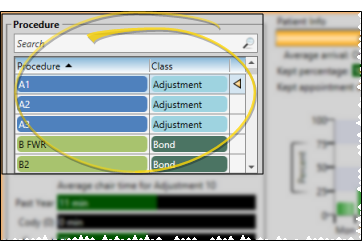
If you use Treatment Sequencing, the next appointment procedure in the sequence is selected for you automatically. (See "Treatment Sequence" for details.) Or, if the patient is listed in the Pending section of your Needs Appointment List, that procedure is the default. (See "Needs Appointment List" for details.)
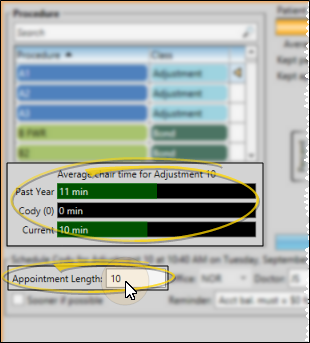
Appointment Length -
Appointment Length Security - Your security settings might prevent you from changing the appointment length as you schedule or edit a patient appointment. This feature has two levels. First, the Scheduling section of your Security editor can prevent operators from changing the length of any appointment. Second, the Appointment Types editor can prevent anyone from changing the length of individual appointment procedure types, regardless of the Security editor settings. If you do not have access to changing the appointment length, that field will be dimmed when you schedule or edit a patient appointment.

Location / Personnel - The office, doctor, and / or assistant that will be scheduled for the appointment are shown. You can change these fields, if needed, unless the selected appointment slot is assigned to a specific doctor, office, or assistant.

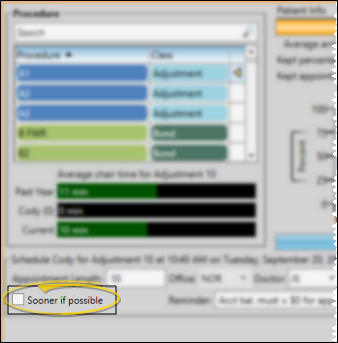
Enable / Disable Sooner if Possible - As you schedule a patient appointment, you can enable the Sooner If Possible option to place the patient on your Sooner if Possible list, making it easier for you to fill appointment slots that become open due to cancellations. See "Scheduler Bar" for details.

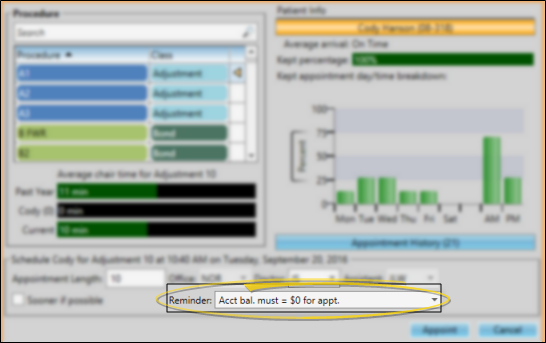
Reminder - To add a reminder to the appointment you may: 1) Select a standard reminder from your list, 2) Type a unique reminder in the text box, or; 3) Use a combination of both methods by selecting a standard reminder, then editing the text as needed. Reminders appear in the patient folder and the Scheduler, the patient Appointment History, and optionally on appointment cards (See "Appointment Reminders Editor" for details.) When the patient has an appointment reminder, you see a notification icon (
 ) in your Scheduler.
 Process Other Appointments While Scheduling New Appointment - As you schedule a new appointment for a patient, you can process previously scheduled appointments directly from the appointment confirmation window.
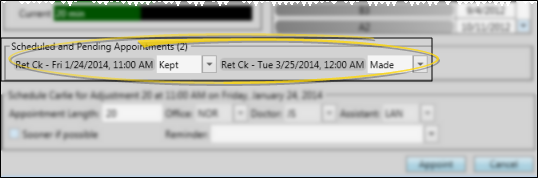
-
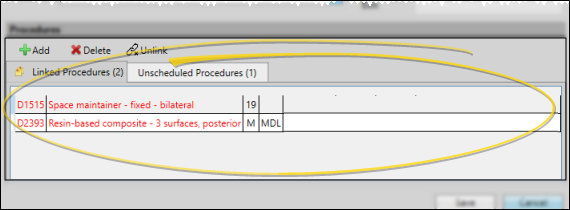
Link Dental Procedures - The bottom of the appointment details window shows any dental procedures that are linked to this appointment.
Add / Delete / Link Procedures - Use the Add, Delete and Unlink icons to apply or remove dental procedures for this appointment. Procedures added and deleted here are also added / deleted from the patient's treatment chart. Procedures you unlink from this appointment remain in the treatment chart, waiting to be linked to another appointment. In addition, you can use the Unscheduled Procedures tab to link dental procedures that have been applied to the patient's treatment chart, but have not yet been assigned to an appointment.
Add Procedure Limitations - While you can assign any dental procedures as defaults in your
-
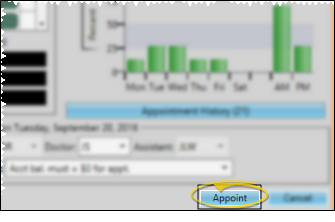
Appoint the Patient - When you are satisfied with the appointment details, click Appoint. If you are scheduling a procedure group or a procedure chain, all the appointments will be scheduled for the date / time shown on the tabs at the top of the window, representing each procedure.
-
Override Scheduling Conflicts - If your Scheduler finds additional conflicting data between your selected appointment time,
Procedure Class Conflict - If the appointment is being scheduled to a grid cell with a different class or column assignment than the selected
-
Respond to Auto-Events and Workflows - Respond to Auto-Events and Workflows triggered by the appointment, such as posting a transaction, printing a letter, or changing the patient's status. See "Appointment Type / Procedure Editor" for details.


Patient Reward Points - (Optional.) Use the Points for scheduling next appointment while in office field of the patient reward triggers options to enter the number of points to award patients that schedule their next appointment before leaving. These points are awarded when a new appointment is scheduled for a patient that is currently signed into your office. See "Patient Reward Trigger Editor" for details.