Quick Scheduler
Use the Quick Scheduler to quickly find open appointment slots for a specific appointment type / procedure.
Classify Your Appointment Type / Procedure Descriptions & Scheduling Grids - You must classify both your appointment type / procedure descriptions and your grid templates for the Quick Scheduling feature to function properly: If you do not use classification, Quick Scheduling will not know which appointment time slots are appropriate for which types of appointments.
-
 Open Your Scheduler - You can open this feature in multiple ways: Use the method that's most convenient for you.
You can open this feature in multiple ways: Use the method that's most convenient for you.
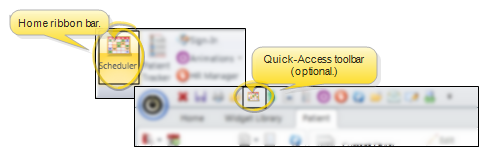
Home ribbon bar or Quick Access toolbar
Clicking the  Scheduler icon from either the Home ribbon bar or your Quick Access toolbar while a Scheduler session is already active can either bring the open Scheduler tab to the front of your Edge Cloud window, or open another Scheduler tab. See "Scheduler User Options" for details about setting up this option.
Patient Folder
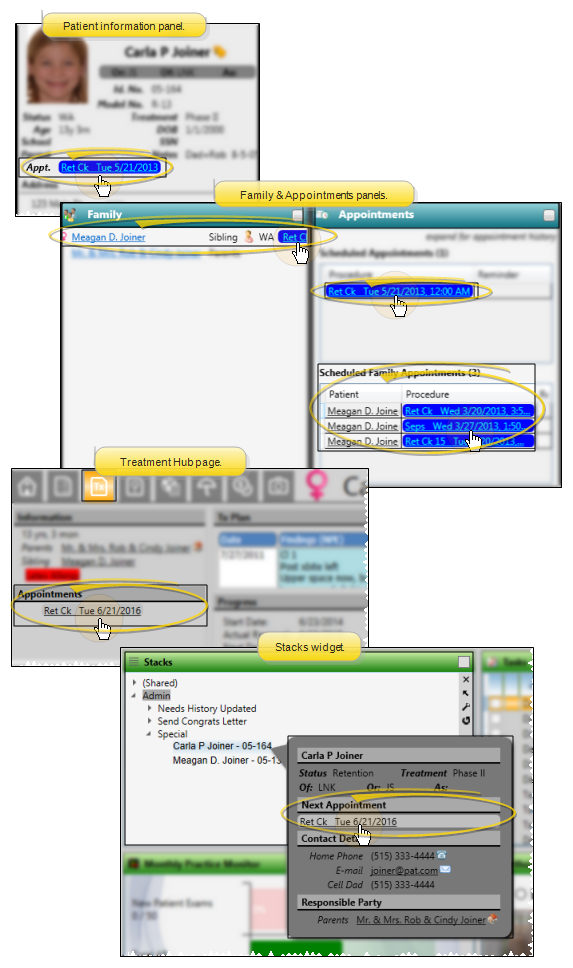
You can open your Scheduler to a specific appointment by clicking the appointment link wherever it appears in the patient folder, such as on the Patient Information Panel, the Family panel, or the Appointments panel of the patient folder Home page, on the Treatment Hub page, or by hovering over the patient name in your Stacks widget.
Arranging Multiple Scheduler Tabs - If you have multiple Scheduler tabs open, clicking a patient appointment link will bring the left-most tab to the front of your Edge Cloud window. Note that before you click the link, you can reorder your tabs by simply dragging them into place, thus selecting which Scheduler tab you want to work with. See "Scheduler User Options" for details about enabling/disabling the multiple Scheduler option.
-
Open Appointment Date - Navigate to the appointment date (or dates) you want to search: Quick Schedule only looks for appointments on the selected date or date range. (See "Your Scheduler" for details about navigating your Scheduler.)
-
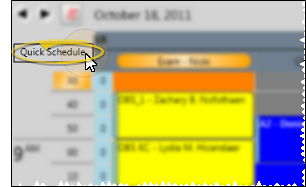
Open Quick Scheduler Options - Click the Quick Schedule link at the left of your scheduling grid to open the quick scheduling options.
-
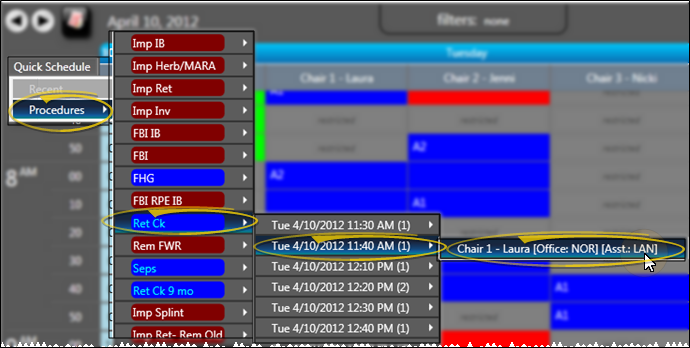
Select Procedure & Time - From the Quick Schedule options, click Procedures to view the list of appointment procedures that would fit into the current grid, or, if you have used Quick Schedule recently, click Recent to view the list of most recent searches. When you select the procedure to search for, the available openings for that procedure appear. Choose the time slot, and chair, if appropriate, you want to appoint. If a patient record is already active, that patient's information will be loaded automatically. Otherwise, you use Fast Find (either typing information or swiping a registered reward card) to search for the patient to work with.
Scheduler Filters Apply - If you have any filters active on your Scheduler, your Quick Schedule filters its results accordingly. See "Your Scheduler" for details.
Assigned Parameters - If the time slot you select is assigned to a specific orthodontist, office, or assistant, that assignment is included along with the chair notation.
Confirm Appointment Details - After finding the appointment time slot for a patient, and responding to any alerts and reminders, the Confirm Appointment Details window opens. You can then review and change certain appointment details, and process previously scheduled appointments to complete the scheduling process.
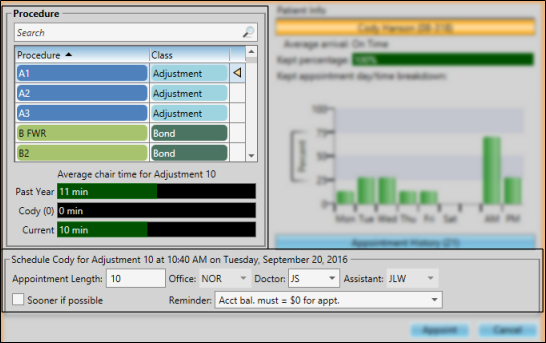
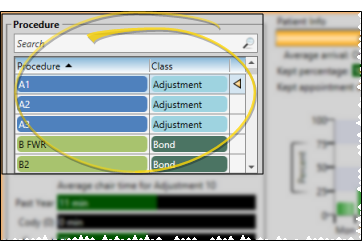
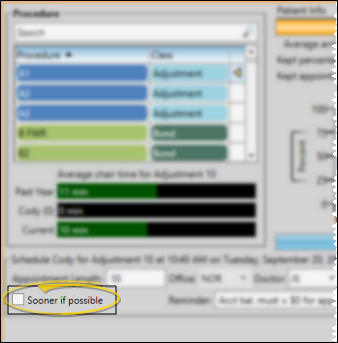
Procedure - To find the appointment type / procedure to work with, you can scroll through the list, or type the beginning of the description in the text box. (Use the Appointment Type / Procedure editor to define your descriptions, classes, and other details.)
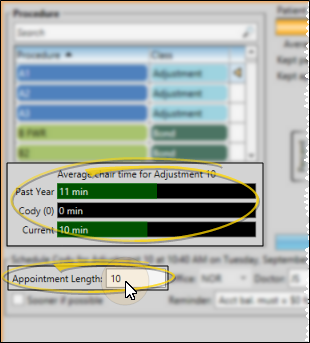
Appointment Length - Enter the number of minutes to schedule for this appointment. The default length for the selected procedure is found in your Appointment Type / Procedure editor. The Scheduler compares the length with the actual number of minutes this appointment generally takes at your office, so you can adjust the length as needed for this patient. (You must use the Patient Tracker for this data to be accurate.)
Appointment Length Security - Your security settings might prevent you from changing the appointment length as you schedule or edit a patient appointment. This feature has two levels. First, the Scheduling section of your Security editor can prevent operators from changing the length of any appointment. Second, the Appointment Types editor can prevent anyone from changing the length of individual appointment procedure types, regardless of the Security editor settings. If you do not have access to changing the appointment length, that field will be dimmed when you schedule or edit a patient appointment.
Location / Personnel - The office, doctor, and / or assistant that will be scheduled for the appointment are shown. You can change these fields, if needed, unless the selected appointment slot is assigned to a specific doctor, office, or assistant.
Enable / Disable Sooner if Possible - As you schedule a patient appointment, you can enable the Sooner If Possible option to place the patient on your Sooner if Possible list, making it easier for you to fill appointment slots that become open due to cancellations. See "Scheduler Bar" for details.
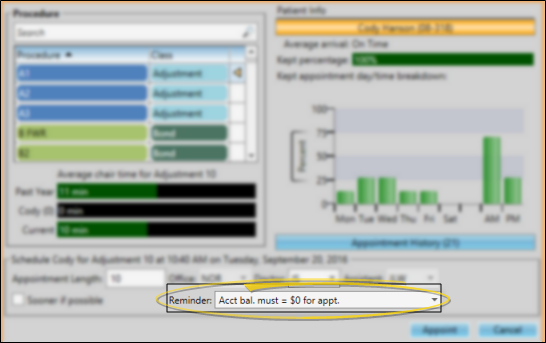
Reminder - To add a reminder to the appointment you may: 1) Select a standard reminder from your list, 2) Type a unique reminder in the text box, or; 3) Use a combination of both methods by selecting a standard reminder, then editing the text as needed. Reminders appear in the patient folder and the Scheduler, the patient Appointment History, and optionally on appointment cards (See "Appointment Reminders Editor" for details.) When the patient has an appointment reminder, you see a notification icon (  ) in your Scheduler.
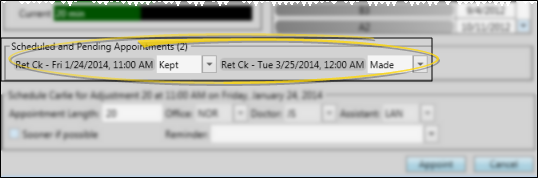
Process Other Appointments While Scheduling New Appointment - As you schedule a new appointment for a patient, you can process previously scheduled appointments directly from the appointment confirmation window.
-
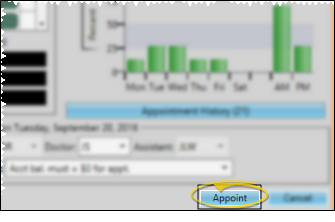
Appoint the Patient - When you are satisfied with the appointment details, click Appoint. If you are scheduling a procedure group or a procedure chain, all the appointments will be scheduled for the date / time shown on the tabs at the top of the window, representing each procedure.
-
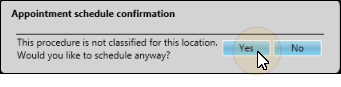
Override Scheduling Conflicts - If your Scheduler finds additional conflicting data between your selected appointment time, appointment type / procedure, and patient, you must confirm that you want to override the assigned classifications before the appointment can be scheduled.
Procedure Class Conflict - If the appointment is being scheduled to a grid cell with a different class or column assignment than the selected appointment type / procedure, you must override the classifications before the appointment can be scheduled.
-
Respond to Auto-Events and Workflows - Respond to Auto-Events and Workflows triggered by the appointment, such as posting a transaction, printing a letter, or changing the patient's status. See "Appointment Type / Procedure Editor" for details.