New Contract Editor
Use the New Contract editor to set up contracts for your patients, with a treatment fee and structured payment plan, as well as open-ended contracts that charge out a set amount at regular intervals indefinitely until you choose an end date.
Contracts vs Proposals - New contracts are activated and added to your total production immediately after saving, while proposals provide a way for the responsible party to review one or more payment schedules before treatment begins. Once they commit, you simply apply the proposal to turn it into an active contract. This topic describes creating a new, active contract: See "Contract Proposals (Legacy Proposal System)" for details about creating and applying proposals.
Contract Template Limitation - You cannot utilize contract templates with the New Contract editor: You can only use contract templates wit the New Contract Proposal editor. See "Contract Proposals (Legacy Proposal System)" for details.
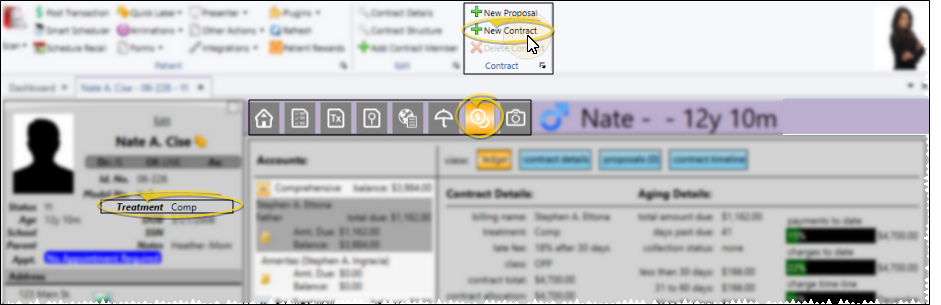
Open the patient's Finance page, and
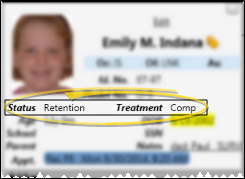
Verify Treatment Phase - Verify that the patient's Patient Information Panel has the correct status and treatment selected: Edge Cloud tracks patient findings, financials, and insurance details by treatment phase, so it is important to verify this information before continuing!
Use the Contract Setup tab to enter the total contract amount, treatment phase, contract members, and whether you are creating an open-ended contract.

Total Amount - Enter the total contract fee for all billing parties and insurance companies that will be paying you. Exclude any open-ended fees that will be charged as part of this contract. This amount will be included in the New Treatment Fees section of the Transaction report.
New Contract Production Adjustments - You cannot apply production adjustments as you create a new contract. You must first save the contract, then open the Contract Structure editor Treatment Fee tab to apply the adjustment.
Treatment - It is important to select the correct treatment phase to assign to this contract. The contract defaults to the patient's current treatment: Under most circumstances, you should choose the default.
Allow Open-Ended Contracts - Open-ended contracts charge recurring fees that are in addition to, or instead of, a total treatment fee amount. If you want this contract to have open-ended fees, be sure to enable this option. Then, set up the open-ended arrangement on the Open Ended Fees tab.
Open-Ended Contract Setup - If you want to include open-ended fees in a contract, you must flag the contract as open-ended, and set up an open-ended arrangement for at least one contract member while you are first creating the contract. Once a contract is active, you can modify open-ended contracts, but you cannot access the Contract Setup tab to enable the Open-Ended option.
Contract Members - All responsible parties and insurance details associated with the patient are listed (unless a responsible party is flagged with Exclude from Financials on the Family panel of the patient Home page). Enable each party that is financially responsible for this contract, and will be paying you.
Insurance Benefits - When the patient receives insurance benefit money directly, the patient is responsible for paying you all financial obligations, and you do not include the insurance company as a member of the financial contract. You do, however, assign the insurance plan to the responsible party, and create an Insurance Detail record for that plan so that you can submit insurance forms on behalf of the patient.
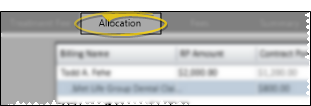
If you have selected two or more contract members, use the Allocation tab to split up the treatment fee among them. Initially, the entire contract fee (not including any open-ended portion of the contract) is allocated to the first contract member.
![]() Manually Adjust Allocation Amounts - You can manually adjust the total contract fee among all contract members by entering the amounts in the billing grid at the top of the window. Click the name of the contract member you want to work with, then enter the appropriate amounts.
Manually Adjust Allocation Amounts - You can manually adjust the total contract fee among all contract members by entering the amounts in the billing grid at the top of the window. Click the name of the contract member you want to work with, then enter the appropriate amounts.
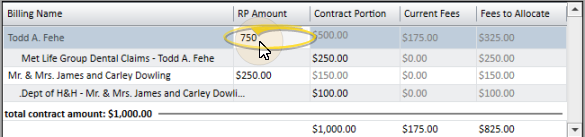
RP Amount - Enter the amount the billing party is responsible for in the RP Amount field for that billing party, including any associated insurance allowance.
Contract Portion - If the party does not have insurance, the RP Amount field will equal the Contract Portion field. If the party has insurance, enter the amount the insurance is expected to pay you in the Contract Portion field of the insurance detail. The Contract Portion field of the billing party adjusts automatically so that the sum of the Contract Portion fields equal the RP Amount field.
Current Fees / Fees to Allocate - The Current Fees column shows you how much money has already been allocated to a payment plan for this party. The Fees to Allocate column shows you how much money still needs to be allocated to a payment plan. The sum of the Current Fees column and the Fees to Allocate column equals the Contract Portion column for that party.
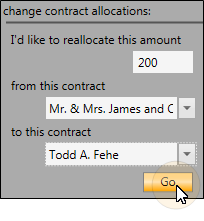
![]() Use Reallocation Tool - Instead of manually entering allocation amounts, you can use the allocation tool at the left of the window to adjust the financial obligations of your contract members.
Use Reallocation Tool - Instead of manually entering allocation amounts, you can use the allocation tool at the left of the window to adjust the financial obligations of your contract members.
-
Enter reallocation amount - Enter the amount you want to move from one party to another.
-
Select where to take the money from - This is the contract from which you want to subtract the reallocated amount. You can select any billing party or insurance detail associated with the contract.
-
Select where to put the money - This is the contract to which you want to add the reallocated amount. Again, you can select any billing party or insurance detail associated with the contract.
-
Apply changes - Click Go at the bottom of the reallocation tool to apply the changes. The amounts in the billing grid at the top of the window will be updated to the new amounts.
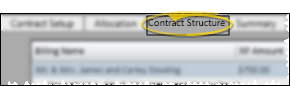
After allocating funds, use the Contract Structure tab to set up the payment schedules.
Use the Contract Structure tab to set up the payment plans for each contract member. (Open-ended fees are in addition to these fees, and not included here). Click the name you want to work with, then add and edit fee types, amounts and dates.
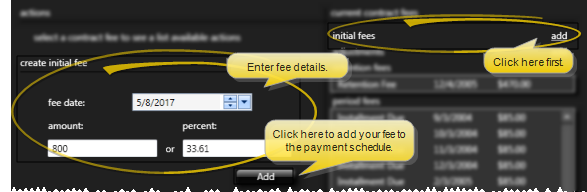
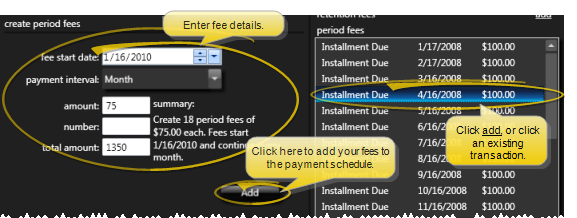
![]() Initial, Retention and Period fees - Click add beside the type of fee you want to create. (If the contract already has payments for that type of fee, click an existing payment instead.) The fields at the lower left of the window default to creating a single transaction for the remaining unallocated amount for this billing party.
Initial, Retention and Period fees - Click add beside the type of fee you want to create. (If the contract already has payments for that type of fee, click an existing payment instead.) The fields at the lower left of the window default to creating a single transaction for the remaining unallocated amount for this billing party.
Add Initial Fees - Enter the date the fee will be due, and either the dollar amount or the percent of the Contract Portion to charge. Then click add.
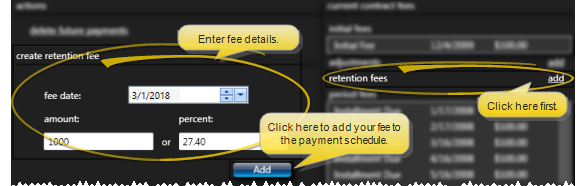
Add Retention Fees - Enter the date the fee will be due, and either the dollar amount or the percent of the Contract Portion to charge. Then click add.
Add Period Fees - Enter the date the first fee in this series should be due, and the payment interval. You can then enter two of the three payment details: The dollar amount, number of payments or total amount for this payment series. The remaining field is calculated automatically, showing you a summary of the transactions that will be created when you click add. If the calculations do not work out evenly, you can either enable the apply remainder to final payment option, or disable the option to add one more payment to the end of the period fee schedule.
![]() Non-Production Adjustments - Non-production adjustments decrease the amount the billing party is obligated to pay, but do not affect your production total. You might apply non-production adjustments, for example, to apply family and referral discounts, electronic payment discounts, or to write off the balance of a transferred or abandoned account.
Non-Production Adjustments - Non-production adjustments decrease the amount the billing party is obligated to pay, but do not affect your production total. You might apply non-production adjustments, for example, to apply family and referral discounts, electronic payment discounts, or to write off the balance of a transferred or abandoned account.
Production vs Non-Production Adjustments - You apply both production and non-production contract adjustments with the Contract Structure editor. Use the Treatment Fee tab to apply production adjustments, such as adding fees for product upgrades. Use the Fees tab to apply non-production adjustments, such as referral discounts.
To apply a non-production adjustment, click add in the adjustments section of the window (or click an existing adjustment, if there is one). Select the adjustment type and specify the dollar amount or percentage of the fee to apply. Then click add. Although you enter a positive amount, the fee schedule is reduced by the adjustment amount. The date of the adjustment is automatically set to today: Your security settings (Office Financial > Modify Contract Adjustment Dates) determine whether you are allowed to change the date.
These transactions appear in the Treatment Fee Adjustments and Changed Treatment Fees sections of your Transaction report.

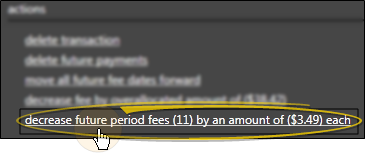
![]() Edit the Payment Plan - Use the actions section of the window to make changes to the payment plan.
Edit the Payment Plan - Use the actions section of the window to make changes to the payment plan.
Delete an Individual Payment - Click a payment, then click the delete transaction action. You might delete a transaction if, for example, you applied an adjustment and need to reduce the number of period fees to charge. Or, you might delete a transaction that was entered in error so that you can add the appropriate fee to the schedule.
![]()
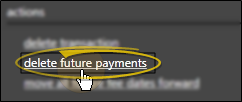
Delete Future Payments / Write Off Account - Click the delete future payments action to erase all transactions that are scheduled to be charged out in the future. You can then reallocate the fee with a new payment schedule, or apply an adjustment for the unallocated amount to write off the fee.
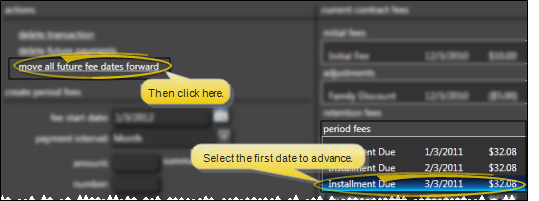
Move All Future Fee Fates Forward (Place contract on "hold") - Click the first transaction to work with, then click the move all future fee dates forward action and enter the number of months to increase each subsequent fee date, regardless of the fee type. In other words, if you choose to move an initial fee transaction forward, all retention fees and period fees that fall after the date of that initial fee will also be moved forward. This feature is especially useful for placing contracts on "hold" for a certain period of time.
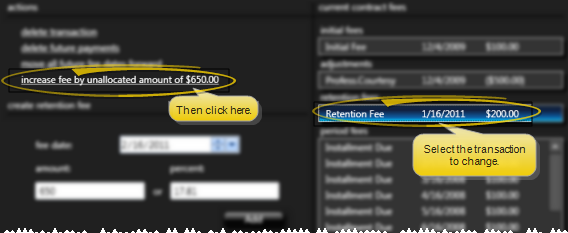
Increase / Decrease Individual Fee by Under / Over Allocated Amount - When the payment schedule is out of balance (often due to removing or adding too many fees or reallocating the contract), you can easily increase or decrease an individual transaction to absorb the difference by selecting the transaction to change and clicking this action.
Increase / Decrease Future Period Fees - When the payment schedule is out of balance (often due to removing or adding too many fees or reallocating the contract), you can click this action to spread out the difference among all remaining scheduled period fees. Of course, if there are no future period fees, this option is not available.
You can change the default descriptions for your contract fees (i.e. Initial Fee, Installment Due) in the System Financial Settings editor. In addition, after a contract is saved, you can edit the contract structure fees to change the descriptions for an individual patient as needed.
(You must have enabled the Allow Open-Ended Contracts option on the Contract Setup tab for this tab to be available.) Enable the Is Open Ended option for the billing party you want to work. Then, enter the amount to charge out at each interval, the date to start charging, and the time interval (monthly, quarterly, etc.). These fees are in addition to any total contract fee amount you allocated to this party.
Open-Ended Contract Setup - If you want to include open-ended fees in a contract, you must flag the contract as open-ended, and set up an open-ended arrangement for at least one contract member while you are first creating the contract. Once a contract is active, you can modify open-ended contracts, but you cannot access the Contract Setup tab to enable the Open-Ended option.
Manage Open-Ended Fees - Unlike standard contracts, you must manually edit, suspend, and stop open-ended fee contrcts. See "Open-Ended Contracts" for details.

Use the Summary tab of the New Contract editor to set up the contract group name, contract class(es), late fee, expected treatment dates, start origin, and treatment coordinator.
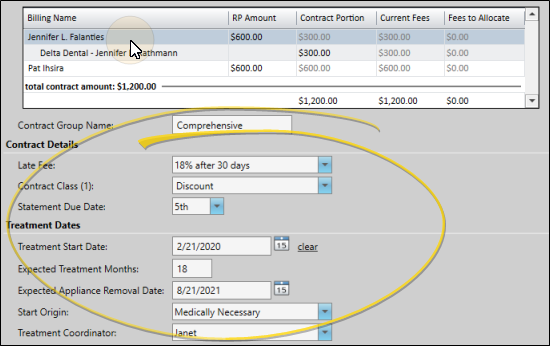
Contract Name (Description) - The contract name, or description, identifies this contract, and defaults to the name of the treatment phase. The name displays on both the Financial and Insurance pages of the patient folder. This field is the same for all contract members.
Contract Details - (Contract member-specific) Select a contract member to work with, then enter the appropriate responses in the Contract Details section of the window (late fee, contract classes and statement due date. Repeat for each contract member.
The late fee applied to miscellaneous charges (i.e. diagnostic records charges and panorex charges) can be different from the late fee applied to contract charges (i.e. initial fees and period fees). See "Responsible Party Records" for details about changing the miscellaneous charge late fee policy.
Treatment Dates / Start Origin / TC - (Contract-specific) Enter the appropriate dates for this contract, and select the start origin and treatment coordinator. Only treatment coordinators assigned to the patient's office will be available in the Treatment Coordinator drop down list. The dates, start origin, and treatment coordinator you supply here will auto-fill into the corresponding fields for this treatment phase on the Findings page and Treatment
Production Applied Immmediately - Regardless of the start date you choose, the entire contract fee is added to your production immediately after you activate the contract.
After reviewing the Summary tab, click Save at the bottom of the New Contract editor return to the Finance page of the patient folder. The entire contract amount must be allocated to a payment plan before you can save the contract. In addition, if you have not entered a treatment start date, you are asked to confirm the omission before saving the contract.
Saving Activates Contract - Once you click Save, the contract becomes active. Regardless of the start date you choose, the entire contract fee is added to your production immediately after you activate the contract. The total contract amount is included in the New Treatment Fees section of the Transaction report.
Combine Contracts Prompt- When you create a new contract, and a partial contract exists for a different treatment phase, you are prompted to combine the contracts at that time. If you do not do so, you cannot later choose to merge them.

Insurance Detail Records - Whenever you include a responsible party's insurance plan as a member of their contract, a new insurance detail record is created automatically. After completing the contract, be sure to open the patient's Insurance page to complete the form submission fields and other details as needed. See "Patient Insurance Page" for details.
Delete a Contract - If you create a contract in error, you can delete it as long as no financial transactions or electronic insurance submissions have been associated with it. See "Delete a Contract" for details.
Trigger a Workflow - Use the Create Contract workflow trigger to activate a workflow whenever you create a new contract for a patient.
Transaction Report - New contracts are listed in the New Treatment Fees section of your Transaction report.