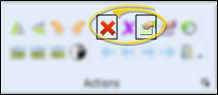
View & edit properties -  Edit >
  Image properties.
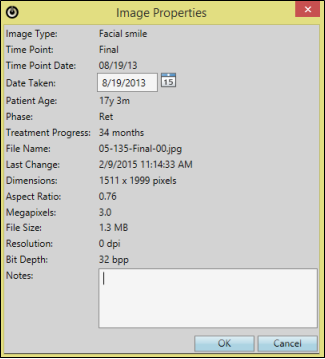
After selecting the image to work with, click Edit from the ribbon bar.
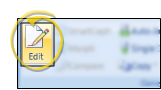
Then choose the Image Properties action.
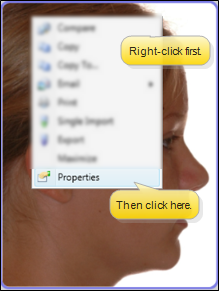
View properties only - You can also view image properties (but not edit them) while not in Edit mode by right-clicking the image and selecting the Properties option.
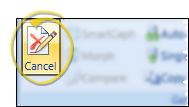
 Save your changes - Click
  Cancel. (If you have enabled the Exit Edit on Save option, you exit Edit mode automatically when you save changes to an image.)