 Edit >
  Image properties.
Click Edit from the ribbon bar.
Then choose the Image Properties action.
Use the Timepoint Properties to view details about all the images within a timepoint, as well as edit the timepoint date.
View the images in the timepoint you want to work with, then open the Timepoint Properties window:
Edit > Image properties.
Click Edit from the ribbon bar.
Then choose the Image Properties action.
View properties - Review and edit the details about the timepoint.

Edit name - (Use with caution.) After all images have been uploaded to the timepoint, you can edit the name without affecting your standard timepoint names. Note that unwanted results will occur if you change the name, then attempt to upload additional images to this timepoint,
Date - Edit the date for this timepoint as needed. This does not change the Date Taken value for the individual images in the timepoint. (See "View & Edit Image Properties" for details.)
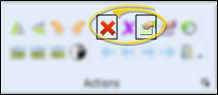
 Save your changes - Click Save to save the changes you have made. If you have enabled the Exit Edit on Save option in your imaging setup, you return to viewing mode after you click Save. Otherwise, you remain in Edit mode, where you can make more changes as needed.
Exit edit mode -  Cancel. (If you have enabled the Exit Edit on Save option, you exit Edit mode automatically when you save changes to an image.)
 │
│
Ortho2.com │1107 Buckeye Avenue │ Ames, Iowa 50010 │ Sales: (800) 678-4644 │ Support: (800) 346-4504 │ Contact Us
Remote Support │Email Support │New Customer Care │ Online Help Ver. 8/3/2015


