 Edit. (See "Edit & Adjust Images" for details.)
You can also use these options with the Single Import feature. See "Import a Single Image" for details.
Use imaging Actions to reverse or re-apply changes you have made to your images, as well as to delete images, and rename or delete entire timepoints.
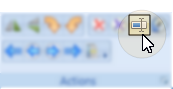
Select the image to work with, then open the Edit window. (Note that your Edge Imaging background changes slightly to indicate when you are in Edit mode.)
Edit. (See "Edit & Adjust Images" for details.)
You can also use these options with the Single Import feature. See "Import a Single Image" for details.
After enabling Edit mode, you initiate all these tools from the Actions section of the
 Undo last action /
  Undo all actions - Use these buttons (or press Ctrl-Z) to reverse changes you have made to the image.
Reverse one action only - Click the image to work with, then click Undo last action to reverse the most recent un-saved change you made to the image during this editing session.
Reverse all actions - Click the image to work with, then click Undo all actions to reverse all un-saved changes you made to the image during this editing session.
This Session Only - Once you save the changes or exit editing mode, you cannot undo your actions. You can, however,  Restore the image to its original state if needed.
 Redo last action /
  Redo all actions - Use these buttons (or press Ctrl-Y) to re-apply changes after using / Undo.
Re-apply one action only - Click the image to work with, then click Redo last actionto re-apply the most recent change you "un-did" during this editing session.
Re-apply all actions - Click the image to work with, then click Redo all actionsto re-apply all changes you "un-did" during this editing session.

This Session Only - Once you save the changes or exit editing mode, you cannot redo your actions. You can, however, Restore the image to its original state if needed.
 Return to specific editing action - View the history of changes you have made to an image, and return to a specific point in the editing trail.
Select the image to work with, then click History. The trail of changes you have made to the image appears, with the most recent change at the bottom of the list.
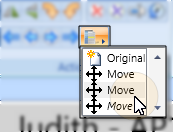
Click the action you want to return to. The image retains any changes you had made up to that point.
Once you save the changes or exit editing mode, the history is cleared. You can, however, Restore the image to its original state if needed.
Restore an image - Return the selected image to the original, as it was imported into the patient record. This will undo all changes you have saved during any editing session.
Select the image to work with, then click Restore.
 Delete an image- Delete this image type for this timepoint.
Select the image to work with, then click Delete Image.
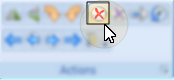
The file is removed from the patient record, and the image will no longer be available to any layout for this patient for this timepoint. This tool is most useful for clearing an image type when you need to replace an image that was imported in error.
 Delete a timepoint - Delete all the images in the selected timepoint.
Select the timepoint to work with, then click Delete Timepoint.
The timepoint and all associated image files are removed from the patient record. This tool is most useful if you accidentally imported images into the wrong patient folder.
 Rename a timepoint - Change the name of an entire timepoint of images.
Select the timepoint to work with, then click RenameTimepoint.
Then type a new timepoint name. This name will be unique to the patient folder.
 Save your changes - Click Save to save the changes you have made. If you have enabled the Exit Edit on Save option in your imaging setup, you return to viewing mode after you click Save. Otherwise, you remain in Edit mode, where you can make more changes as needed.
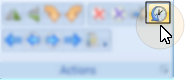
Refresh - Click  Refresh on the Quick Access toolbar (or press F5 on your keyboard) to refresh the data on your screen.
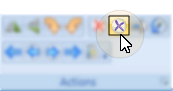
Exit edit mode -  Cancel. (If you have enabled the Exit Edit on Save option, you exit Edit mode automatically when you save changes to an image.)
 │
│
Ortho2.com │1107 Buckeye Avenue │ Ames, Iowa 50010 │ Sales: (800) 678-4644 │ Support: (800) 346-4504 │ Contact Us
Remote Support │Email Support │New Customer Care │ Online Help Ver. 8/3/2015


