Smart Scheduler
Use the Smart Scheduler to search for, identify, and schedule patient appointments. Just select your appointment type, the desired date or number of weeks out, and other details to narrow or widen the search for available appointment time slots. You can even use the Smart Scheduler to schedule near other family member appointments. Then let the Smart Scheduler search for the available times that fit those parameters.
Watch video tutorial. (Windows Media Player, an active Internet connection, and a valid Ortho2 customer login are required to run video tutorials, webinars, and training programs.)
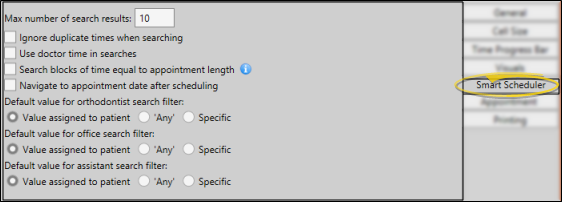
Use the Smart Scheduler user options to set up many choices that define how your Smart Scheduler works for you, including how many available appointments to list in your search window, using Doctor Time scheduling, and applying default doctor, office, and assistant filters. See "Smart Scheduler Options" for details.
-
 Open the Smart Scheduler- You can open this feature in multiple ways: Use the method that's most convenient for you.
Alert Stop - If the patient has an alert trigger enabled for this feature, the Alert Stop pup-up window will appear when you initiate this feature for the patient. Review the alert information, then click the box to continue. (See "Patient Alerts" for details.)
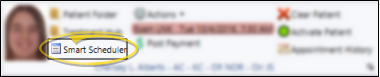
Patient Folder - Patient ribbon bar > Patient section >
 Smart Scheduler.
Scheduler - (Option 1.) - Scheduler ribbon bar > Active Patient section > Smart Scheduler (or press Ctrl+E on your keyboard). A patient must be active in your Scheduler for this option to function. See "Your Scheduler" for details.
Scheduler - (Option 2.) Scheduler ribbon bar > Actions section >
Smart Scheduler. If a patient record is already active, that patient's information will be loaded automatically. Otherwise, you use Fast Find (either typing information or swiping a registered reward card) to search for the patient to work with.
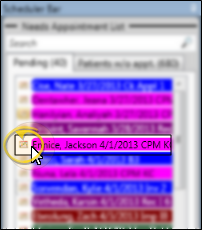
Needs Appointment List - Click the
 Smart Scheduler button beside the patient name in your Needs Appointment List, or right-click the name and select Search for Appointment to open the Smart Scheduler for that patient. See "Needs Appointment List" for details
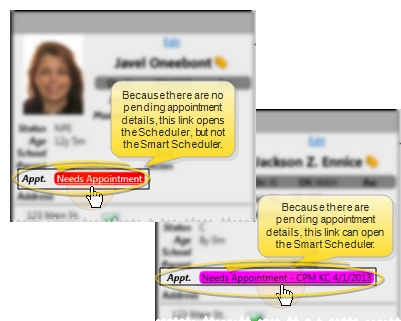
Patient Information Panel - In addition, you can set up your system so that clicking a Needs Appointment link on the Patient Information Panel of a patient folder opens the Smart Scheduler for the patient, defaulted to the suggested next procedure. (See "Scheduler User Options" for details about this scheduling option.) This feature works only for patients on the Pending section of the Needs Appointment List, and not patients on the Patients Without Appointments section.

-
Review Patient and Family Information - Review this patient's
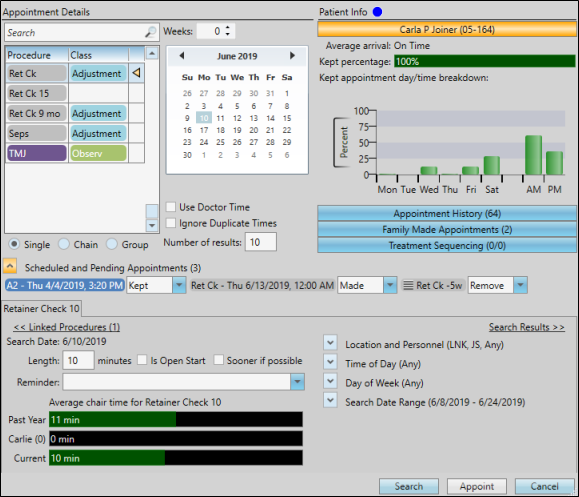
Patient Info - Click a header to expand the information you want to see. Any applied visual tags (a blue circle in our example) always appear beside the "Patient Info" header.

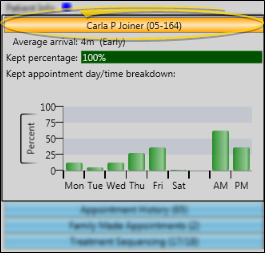
Patient Compliance - Click the patient name header to review how well this patient complies with appointments at your office. (You must use the Patient Tracker and appointment processing for this data to be accurate.)

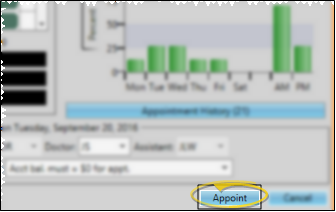
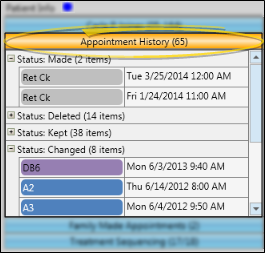
Appointment History - Review currently scheduled appointments, as well as the history of appointments this patient has kept, missed, and changed.

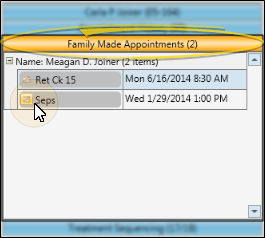
Family Made Appointments - Review any appointments family members currently have scheduled at your office. This feature is useful for parents that want to schedule multiple appointments on the same day.

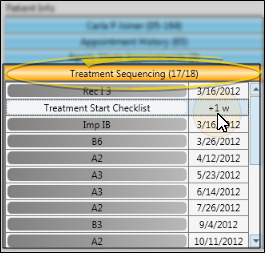
Treatment Sequence Progress - You can review a patient's treatment sequence while scheduling an appointment. This feature helps you stay on the proposed course of treatment with every appointment. See "Treatment Sequence" for details.

-
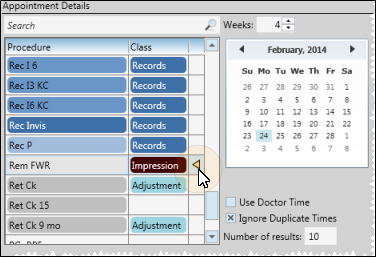
Select Appointment Details - Select the appointment procedure, target search date, and other details you want the Smart Scheduler to look for.
Scheduling an Individual Procedure -
Scheduling a Procedure Group or Chain - Procedures you have set up as groups or chains that should be scheduled together appear in the procedure list preceded by CH: (indicating a procedure chain) or PG: (indicating a procedure group.) See "Procedure Groups & Chains Editor" for details. If you select a procedure group or chain, the Smart Scheduler provides a detail tab for each procedure involved.
Weeks from Today / Date - (Optional.) You can optionally use the "weeks" field and the calendar to select the target date to start searching for appointments. The default number of weeks from today is set up in your Grid General Options. In addition to using the "weeks" field and the calendar, you can fine-tune the dates to search with the Search Date Range options, described below, or the Schedule Near Family option.
Use Doctor Time - Choose whether you want the Smart Scheduler to calculate doctor time already scheduled for other chairs when selecting available appointment openings. If this feature is enabled, the Smart Scheduler will ignore chairs that look available, but would cause doctor time to be overbooked for that time interval. If this feature is disabled, doctor time is ignored as the Smart Scheduler searches for open appointment times. You set the default for this feature in your Grid > Smart Scheduler User Options.
Ignore Duplicate Times - Enable the Ignore Duplicate Times option to list an available appointment time only once, regardless of the number of chairs you have open at that time. If this feature is disabled, the Smart Scheduler will list each chair that is available as a separate appointment. You set the default for this feature in your Grid > Smart Scheduler User Options.
Number of Results - Select the number of available appointment openings to include in your search list. If you cannot find an appropriate appointment time from that list, you can make this number larger, or change your Search Details to expand your search results. You set the default for this feature in your Grid > Smart Scheduler User Options.
-
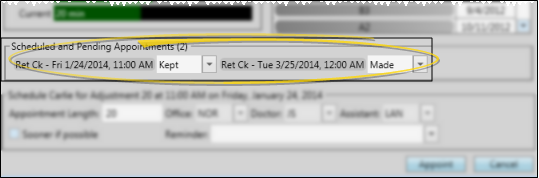
Process Other Appointments While Scheduling New Appointment - As you schedule a new appointment for a patient, you can process previously scheduled appointments directly from the appointment confirmation window.
-
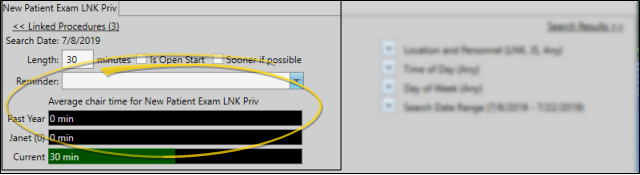
Refine Appointment Details - The bottom portion of the window includes the details about the procedure you are scheduling. You can review the average time this procedure takes, change the length of the procedure, enable / disable certain scheduling options, and assign a reminder before searching for available openings.
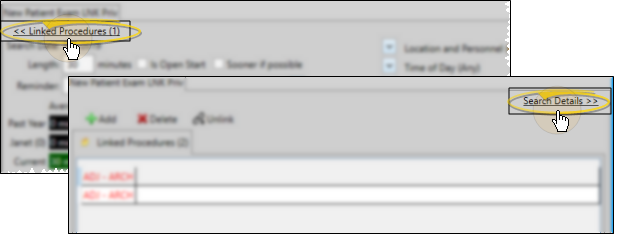
You use the << Linked Procedures and Search Details >> links that appear at the top of this section of the window to toggle between the appointment details and linked dental procedures windows.
Length -
Open Start - Enable this option if you want
Enable / Disable Sooner if Possible - As you schedule a patient appointment, you can enable the Sooner If Possible option to place the patient on your Sooner if Possible list, making it easier for you to fill appointment slots that become open due to cancellations. See "Scheduler Bar" for details.
Reminder - To add a reminder to the appointment you may: 1) Select a standard reminder from your list, 2) Type a unique reminder in the text box, or; 3) Use a combination of both methods by selecting a standard reminder, then editing the text as needed. Reminders appear in the patient folder and the Scheduler, the patient Appointment History, and optionally on appointment cards (See "Appointment Reminders Editor" for details.)
-
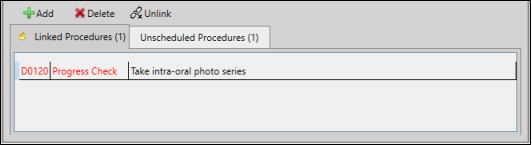
Link Dental Procedures - Click the << Linked Procedures link in the details section of the window, then review, add, and remove dental procedures for this appointment.
You use the << Linked Procedures and Search Details >> links that appear at the top of this section of the window to toggle between the appointment details and linked dental procedures windows.
Use this section of the window to review any dental procedures that were automatically linked when you selected this
-
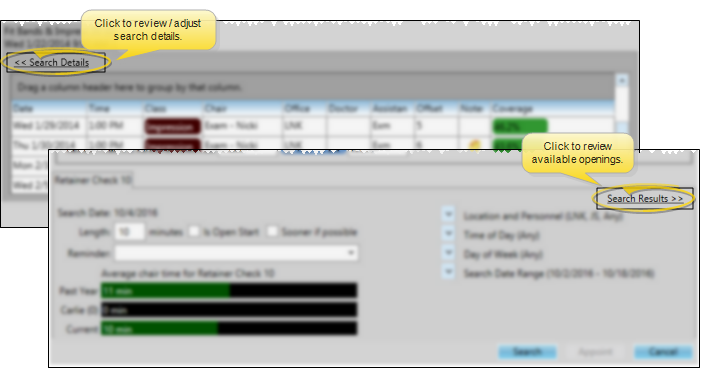
Search Details - Narrow or expand your search for available appointment openings by specifying a location, doctor, or assistant, and limiting the search to specific days, times, and dates. Click the down arrow beside each setting that you want to change to open the details for that parameter.
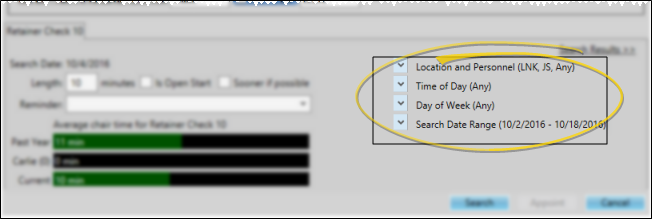
Location and Personnel - Use these settings to limit your search to a specific office, orthodontist and/or assistant, or search for all available openings. Each option defaults to the location or person assigned to the patient folder. If you attempt to schedule to an office, doctor or assistant that is not assigned to the patient, you must confirm your action before the appointment will be scheduled.
Time of day - Use these settings to select a specific time of day to search, or, leave these fields blank to search any available time during your scheduling day. Use the Appointment Procedures / Types editor to set up the default times of day for specific procedures.
Day of week - Use these settings to flag one or more days of the week to search: Or, leave all days of the week unmarked to search any available scheduling days.
Search Date Range - Select the beginning and ending dates to search. This option defaults to searching two days before and two weeks after the target date you selected on the calendar at the top of the Smart Scheduler window. You can also use the Schedule Near Family Appointment feature to automatically select dates near another appointment.
-
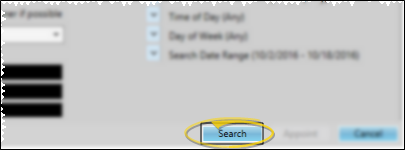
Initiate Search - Click Search to look for appointment openings that match your appointment and search details.
-
Review Results - Your Smart Scheduler window toggles to show you the search results, including the available dates and times, and associated doctor, office, assistance, number of days from your "target" date, currently scheduled percentage for that day, and any Scheduler notes.
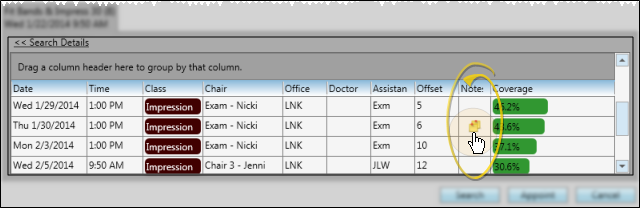
Sort Order - Click a column heading to sort the results by that column: Click the same heading again to reverse the sort order.
Grouping - You can group the search results by any column by dragging that column heading to the space above the results list. For example, you might group by chair, then search the results of a specific chair. You can drag multiple column headings to the grouping area to create a hierarchy of groups as needed. Drag the group heading back to the results list to remove the grouping.
-
Toggle Search Details / Search Results - You can use the Search Results >> and << Search Details links to toggle between viewing the appointment and search details you selected, and the list of available openings. You might do this, for example, if you need to adjust the appointment and search details to expand or narrow your list of openings. If you do change any search details, be sure to click Search at the bottom of the window again to refresh the list of results.
-
Appoint the Patient - When you are satisfied with the appointment details, click
-
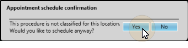
Override Scheduling Conflicts - If your Scheduler finds additional conflicting data between your selected appointment time,
Procedure Class Conflict - If the appointment is being scheduled to a grid cell with a different class or column assignment than the selected
-
Respond to Auto-Events and Workflows - Respond to Auto-Events and Workflows triggered by the appointment, such as posting a transaction, printing a letter, or changing the patient's status. See "Procedures Editor" for details.


Navigate to Appointment Date After Scheduling (Optional.) - Use your Smart Scheduler user options to choose whether to open the Scheduler to the appointment date after you appoint a patient with the Smart Scheduler. See "Smart Scheduler Options" for details.
Automate Smart Scheduler Appointments - Use the Make an Appointment workflow activity to open the Smart Scheduler or Recall Appointment window for the patient whenever the activity is triggered by a workflow. See "Workflow Activities" for details.
![]()
www.ortho2.com │ 1107 Buckeye Ave. │ Ames, IA 50010 │ 800.346.4504 │ Contact Us
Chat with Software Support │ Chat with Network Engineering │ Chat with New Customer Care
Remote Support │ Email Support │ Online Help Ver. 11/11/2019


