Patient Transactions Panel
Use the Transactions panel of the patient folder Home page to view and work with the patient's financial ledger. You can filter the ledger by the type of transaction to include, and whether to include future contract charges. The transactions for all of the patient's accounts, as well as the total charge and receipt amounts and the patient's outstanding balance are included.
Open the patient folder Home page, and enable the ![]() Transactions panel. (See "Patient Home Page" for details about opening the patient's Home page and selecting the panel(s) to view. The process is slightly different, depending on whether Normal panel mode or Single Expanded panel mode is enabled in your Visual User Options.)
Transactions panel. (See "Patient Home Page" for details about opening the patient's Home page and selecting the panel(s) to view. The process is slightly different, depending on whether Normal panel mode or Single Expanded panel mode is enabled in your Visual User Options.)
![]()
Open Ledger from Patient Finances Page - You can also view patient transactions by clicking the Ledger tab from the Finance page of the patient folder. See "Patient Finance Page" for details.
Open Ledger From Post Transaction Window - Click a responsible party name in the Account Holder column of the contract list that's displayed at the top of the Post Transaction window to open the patient's Finance page to the ledger details. You may need to drag the Post Transaction window to another location on your screen, or minimize it to your task bar in order to view the transactions.
![]() Expand / Collapse / Move the Panel
Expand / Collapse / Move the Panel
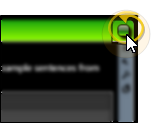
If the patient's Home page is in Normal mode, you can click the top-right box, or double-click the header to expand or collapse the panel, and drag the panel around the screen. If you opened the Home page in Single Expanded mode, the selected panel will be expanded, and all other panel headers appear at the right.
Certain features only function when the panel is expanded. If a feature doesn't seem to be working, be sure you are in expanded panel mode. See "Patient Home Page" for details.
Click the bar between two columns to reallocate the column space. Be aware that it is possible to adjust a column to be so narrow that you no longer see it.
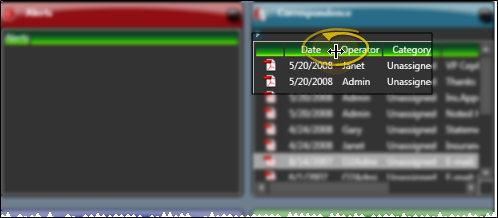
Click a column heading and drag it to a new location within the window. Other columns adjust accordingly.

![]() Filter Transactions - Click the panel heading or the Filter tab at the right of the window to display your choices. Then, choose the type of transactions to include in the ledger.
Filter Transactions - Click the panel heading or the Filter tab at the right of the window to display your choices. Then, choose the type of transactions to include in the ledger.
![]()
Transaction Type to Include - Select to include only a certain transaction type, such as receipts, or all transactions. The heading changes to indicate the type of transactions you are viewing.
![]()
Display Future Charges Option - Enable this option to include contract charges scheduled for future dates. The panel heading indicates that you are viewing all transactions. Disable this option to view only charges with dates of today or in the past. The heading indicates that you are viewing all transactions on or before today's date.

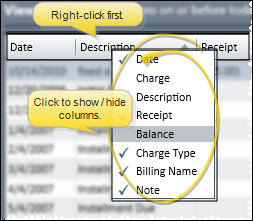
![]() Show / Hide Columns - Right-click any column heading, then click a heading name to show / hide that column on your ledger.
Show / Hide Columns - Right-click any column heading, then click a heading name to show / hide that column on your ledger.
![]() Manage Transactions - You can adjust amounts, apply notes, audit the posting trail, and print payment receipts for transactions from the patient's ledger.
Manage Transactions - You can adjust amounts, apply notes, audit the posting trail, and print payment receipts for transactions from the patient's ledger.
Adjust Miscellaneous and Dental Charges - Double-click a miscellaneous or dental charge*, or right-click and select Adjust. Then enter the amount and reason for the change. See "Adjust Miscellaneous Charges." for details. (You cannot adjust orthodontic contract charges in this manner: See "Contract Structure Editor" for details about making changes to contracts.)
* While miscellaneous dental charge types are posted in a similar manner, charges posted with descriptions from your Dental Charge Types editor are classified as dental charges, while charges posted with descriptions from your Miscellaneous Charges editor are classified as miscellaneous charges in the patient's ledger.
Adjust Receipt - Double-click a receipt, or right-click and select Adjust. Then select the reason for the change, and other details. See "Adjust Receipts" for details. (You cannot issue refunds from the patient's transaction ledger: See "Issue Refunds" for details about posting this type of transaction.)
Exclude From Deposit Slip - (Uncommon.) You can right-click a receipt in the patient's transaction ledger, and select Exclude From Deposit Slip. The receipt will still be applied to the patient account, and included in the Receipts section of your Transaction report (flagged with an asterisk * ), but it will not be counted as part of your deposits for the day. You might use this feature, for example, if you are re-entering a payment after making a correction, and the payment amount had already appeared on a deposit slip,
Edit Note - Right-click a transaction, then select Edit note. You can then review and enter further details about the transaction. The notes can optionally appear on the patient's Financial History form. (See "Financial History Form" for details.)
Audit Transaction - Right-click a transaction and select Audit. Then review details about when and who posted the transaction. (You can also audit the last-posted transaction directly from the Post Transactions window.)
Generate Receipt of Payment - Right-click a payment, and select Receipt. Then select View to choose the receipt output options; or select Print to generate the receipt with your current Quick Report settings; or select Email to use your Form Email Setup options. When generated in this manner, the receipt is not recorded in the correspondence history. See "Receipt of Payment Forms" for details.
Contract Payment Plan Descriptions - You cannot edit contract payment plan descriptions (i.e. "Initial Fee", "Installment Due") from within the ledger, but you can edit the descriptions with the Contract Structure tool. See "Contract Fees and Non-Production Adjustments" for details.
Print Adjustment Audit - Run an Adjustment Audit report to review receipt adjustments, miscellaneous charge adjustments, treatment fee adjustments, and receipts you have flagged as excluded from your deposit slip (by right-clicking the transaction in the patient's ledger), for any range of dates or Transaction reports. See "Adjustment Audit Report" for details.
Trigger a Workflow - Use the Transaction Excluded from Deposit Slip workflow trigger to activate a workflow whenever you flag a ledger receipt with Exclude From Deposit Slip. (Note that receipt adjustments and refunds are always excluded from the deposit slip, and do not trigger this workflow.)