You can manually select an appointment time slot to schedule a patient appointment.
 Scheduler > Manual Scheduling or Quick Scheduling.
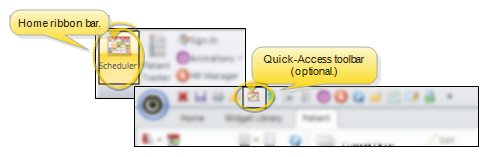
Click the Scheduler button from the Tasks section of the Home ribbon bar.
When you use Manual Scheduling or Quick Scheduling, the Appointment Details window opens for you to select the appointment details.
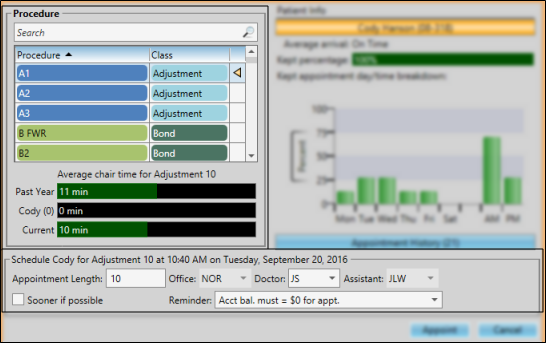
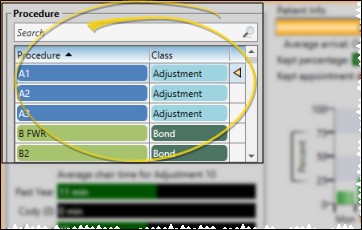
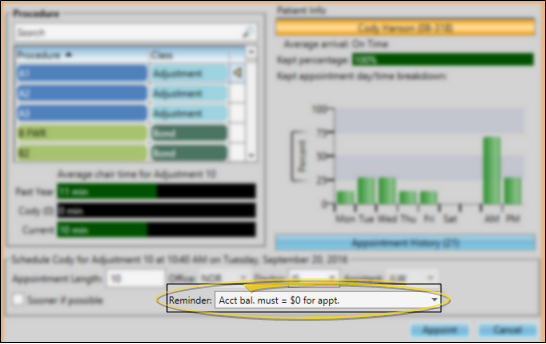
Choose procedure - To choose a procedure, type the beginning of the procedure name in the text box, or use the scroll bar and click the procedure you want to work with. Use the Procedure Editor to define your procedure names, classes, and other details. Note that you must use the Smart Scheduler to schedule procedure groups or chains: If you use manual scheduling or quick scheduling, you must schedule each appointment separately.
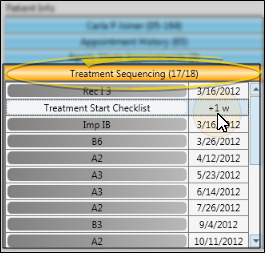
If you use Treatment Sequencing, the next appointment procedure in the sequence is selected for you automatically. (See "Add & Edit Treatment Sequence" for details.) Or, if the patient is listed in the Pending section of your Needs Appointment List, that procedure is the default. (See "Needs Appointment List" for details.)
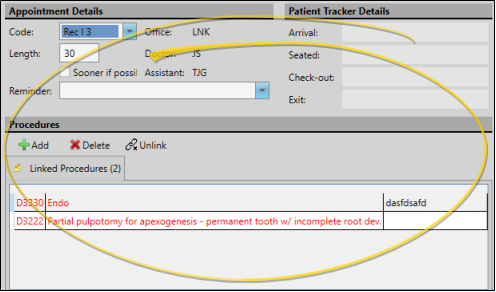
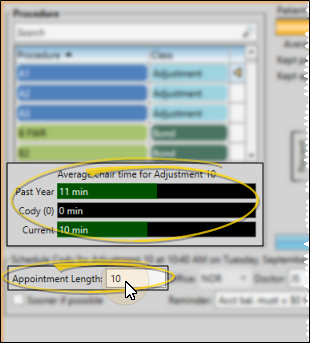
Appointment length - Enter the number of minutes to schedule for this appointment. The default length for the selected procedure is found in your Procedure Editor. The Scheduler compares the length with the actual number of minutes this procedure generally takes at your office, so you can adjust the length as needed for this patient. (You must use appointment tracking for this data to be accurate.).
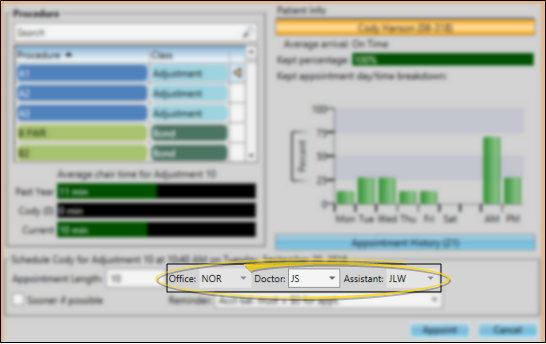
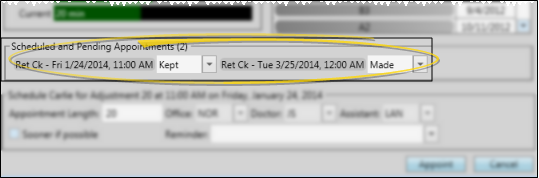
Location / personnel - The office, doctor, and / or assistant that will be scheduled for the appointment are shown. Because you have already selected the appointment time slot, these fields cannot be changed.
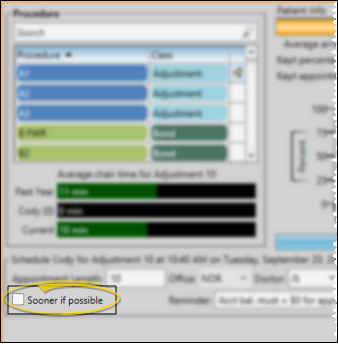
Enable / disable Sooner if possible - As you schedule a patient appointment, you can enable the Sooner If Possible flag to place the patient on your Sooner if Possible list, making it easier for you to fill appointment slots that become open due to cancellations.See "Manage Scheduler Bar Clipboards & Lists" for details.
Reminder - Select a reminder to appear with the appointment, and optionally to print on the appointment card. (Use the Appointment Reminders Editor to maintain your list of reminder messages.)  ) in your Scheduler.
Review patient and family information - Review this patient's
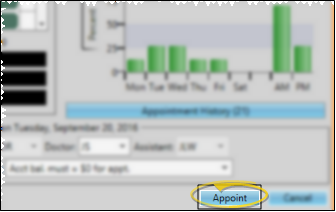
Patient compliance - Review how well this patient complies with appointments at your office. (You must use the Patient Tracker and appointment processing for this data to be accurate.)
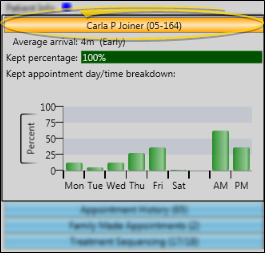
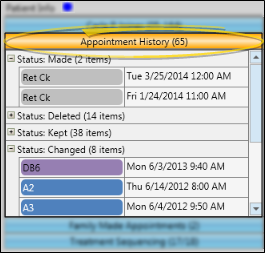
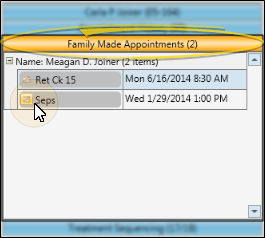
Appointment history - Review currently scheduled appointments, as well as the history of appointments this patient has kept, missed, and changed.
Treatment Sequence progress - You can review a patient's treatment sequence while scheduling an appointment. This feature helps you stay on the proposed course of treatment with every appointment. See "Add & Edit Treatment Sequence" for details.
Process scheduled/pending appointments - As you schedule a new appointment for a patient, you can process previously scheduled appointments directly from the appointment confirmation window.
Appoint the patient - When you are satisfied with the appointment details, click Appoint.
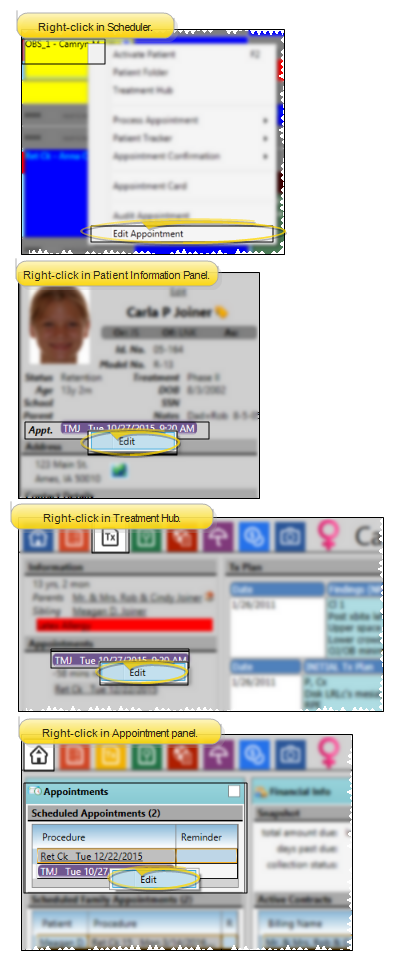
Edit Appointment Details![]() - Right-click an appointment in your schedule, from the patient information panel, or from the expanded Appointment panel of the patient folder Home page, and select Edit Appointment to change the appointment details, including the procedure, appointment length, reminder, and Patient Tracker times. You can also enable / disable the
- Right-click an appointment in your schedule, from the patient information panel, or from the expanded Appointment panel of the patient folder Home page, and select Edit Appointment to change the appointment details, including the procedure, appointment length, reminder, and Patient Tracker times. You can also enable / disable the  Sooner if Possible option to add / remove the patient from your Sooner if Possible scheduler board.
 Alert - If the patient has an alert stop flag for this feature, the alerts box will appear when you initiate this feature for the patient. Review the alert information, then click the box to continue. (See "Patient Alerts" for details.)
 │
│
Ortho2.com │1107 Buckeye Avenue │ Ames, Iowa 50010 │ Sales: (800) 678-4644 │ Support: (800) 346-4504 │ Contact Us
Remote Support │Email Support │New Customer Care │ Online Help Ver. 8/3/2015