With the Treatment
You can open this feature in multiple ways: Use the method that's most convenient for you.
Patient Folder![]() Open a patient folder and go to the
Open a patient folder and go to the  Treatment Hub
Scheduler - Right-click an appointment and select Treatment Hub, or activate a patient and select the Treatment Hub icon from the Scheduler ribbon bar to open the patient's Treatment Hub page.See "View & Navigate Your Schedule" for details.
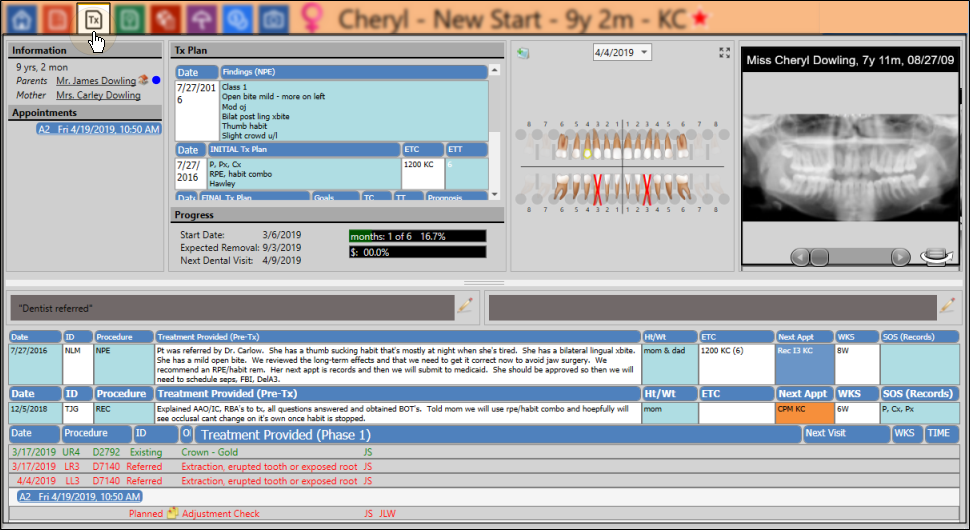
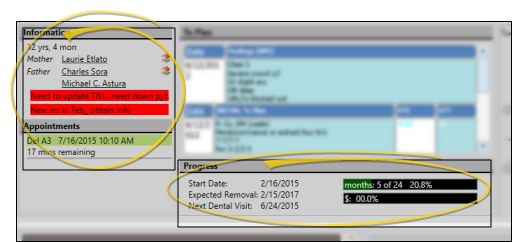
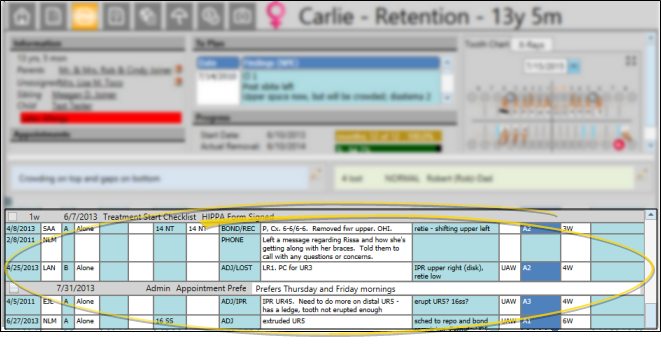
Patient Information & Progress![]() The patient information and progress sections of the Treatment Hub include the patient age, responsible party and family names, medical alerts (in red), significant treatment dates, contract progress and scheduled appointments. Because all of this information always appears at the top of the Treatment Hub, you might want to keep the patient information panel minimized during general use.
The patient information and progress sections of the Treatment Hub include the patient age, responsible party and family names, medical alerts (in red), significant treatment dates, contract progress and scheduled appointments. Because all of this information always appears at the top of the Treatment Hub, you might want to keep the patient information panel minimized during general use.
Treatment Plan![]()
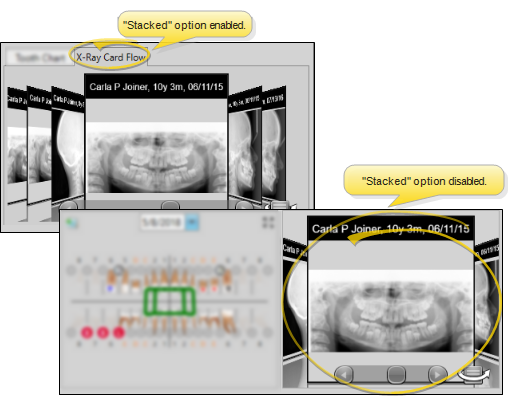
Patient Images![]()
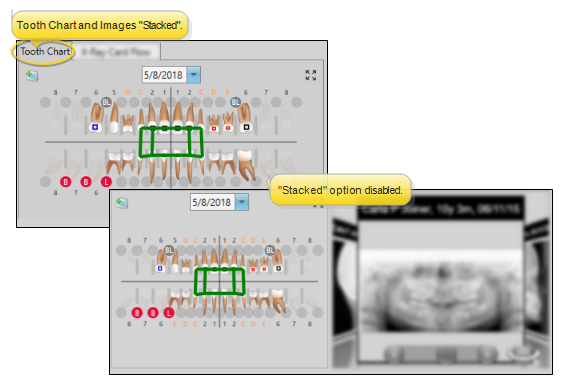
Tooth Chart![]()
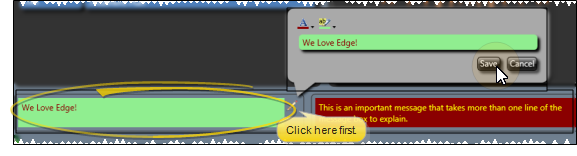
Messages![]() You can include up to two patient-specific messages that appear in the middle of the treatment hub. If at least one of your messages is two or more lines long, the message box area of the treatment chart "grows" to fit all your text. To change a message text or colors, click the
You can include up to two patient-specific messages that appear in the middle of the treatment hub. If at least one of your messages is two or more lines long, the message box area of the treatment chart "grows" to fit all your text. To change a message text or colors, click the  icon beside the message you want to edit. Then type the new message, and select the text color and background color to use.
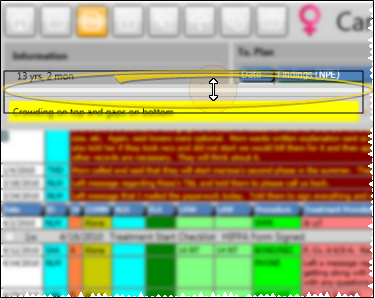
Resize Summary & Records Sections![]() Use the slider bar between the message fields at the top of the treatment chart records and the patient summary to change the space allotted to each section. You can use the slider to completely eliminate the summary section, providing the maximum space for viewing treatment chart records.
Use the slider bar between the message fields at the top of the treatment chart records and the patient summary to change the space allotted to each section. You can use the slider to completely eliminate the summary section, providing the maximum space for viewing treatment chart records.
Treatment Chart Records![]() Review the treatment chart records you have
created for this patient. The information shown in an individual record depends upon the style you used to create it The records are listed in the order you create them, so you accumulate a chronological record of activity as a patient progresses through treatment. See "Add, Edit, & Sign Treatment Chart Records" for details.
Review the treatment chart records you have
created for this patient. The information shown in an individual record depends upon the style you used to create it The records are listed in the order you create them, so you accumulate a chronological record of activity as a patient progresses through treatment. See "Add, Edit, & Sign Treatment Chart Records" for details.
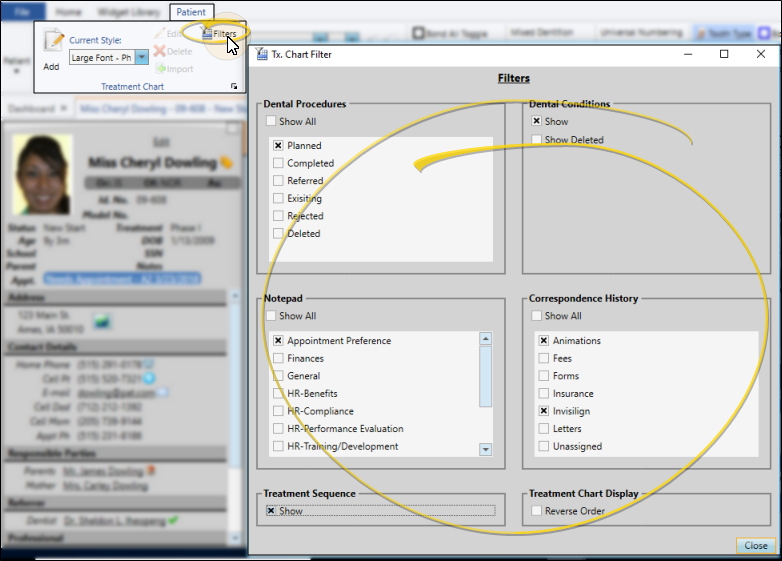
Show / Hide Notepad, Correspondence History, and Treatment Sequence Entries![]() Your Treatment Hub can optionally display patient notepad entries, Correspondence History documents, and Treatment Sequence items within the list of treatment chart records. To choose which items to include, click the
Your Treatment Hub can optionally display patient notepad entries, Correspondence History documents, and Treatment Sequence items within the list of treatment chart records. To choose which items to include, click the  Filter icon at the top left of the treatment chart records section, and select enable / disable items as needed. Edge remembers your filter settings the next time you view the Treatment Chart.If other Edge users want the settings you have chosen, you can use the Assign Options tool to copy your settings them.
Print Treatment Hub - Click  Print from your File ribbon bar or Quick Access toolbar (or press Ctrl+P on your keyboard) to print a copy of the current screen contents. (See "Printing from Edge" for details.) You can choose to include all data from the current screen, including the patient information and progress, treatment plan, and tooth chart on the print out, or include only the currently displayed treatment chart records.
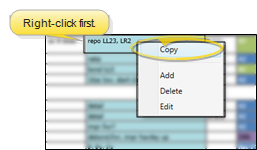
Copy Column Text![]() You can right-click a treatment chart column to copy the text to your clipboard. You can then paste the text into another
You can right-click a treatment chart column to copy the text to your clipboard. You can then paste the text into another
Sign Treatment Chart Records - Users with appropriate security rights can right-click to sign treatment chart entries, lending additional accountability to the records. This feature is especially useful in university settings, where entries are double-checked for accuracy. See "Add, Edit, & Sign Treatment Chart Records" for details.
Audit Records - Right-click to audit any treatment chart record.
Add & Edit Treatment Chart Records - Add a treatment chart record to a patient folder to document each procedure you complete for a patient. You can manually enter treatment chart records, import findings data, and automatically add data while you edit a patient's tooth chart. In addition, you can verify treatment chart activity by requiring authorized persons (such as your orthodontists) to sign new entries before they become a permanent part of the patient's record.See "Add, Edit, & Sign Treatment Chart Records" for details.
Delete Record - Select a record that has been created within the past 24 hours, and click  Delete on the Treatment Chart or Treatment Plan section of the Patient ribbon bar, or right-click the record and select Delete.
 Alert - If the patient has an alert stop flag for this feature, the alerts box will appear when you initiate this feature for the patient. Review the alert information, then click the box to continue.
Trigger a Workflow - Use the Open Treatment Chart, Create Treatment Chart Entry or Edit Treatment Chart Entry workflow trigger to activate a workflow whenever you open the Treatment Hub page, or create / edit a treatment chart record for a patient folder. See "Workflow Trigger Editor" for details.
Automate Record Creation with a Workflow - Use the Create Tx. Chart Entry workflow activity to open the patient's Treatment Hub and add a new treatment chart record whenever the activity is triggered by a workflow. See "Set Up Workflows" for details.
Work with Patient Folders![]() Edge includes several tools for working within your patient folders, regardless of which page is currently selected.
Edge includes several tools for working within your patient folders, regardless of which page is currently selected.
 │
│
Ortho2.com │1107 Buckeye Avenue │ Ames, Iowa 50010 │ Sales: (800) 678-4644 │ Support: (800) 346-4504 │ Contact Us
Remote Support │Email Support │New Customer Care │ Online Help Ver. 8/3/2015


 Guardian icon appears beside a name to indicate when the patient's address exactly matches the responsible party's address, indicating that the patient lives with that party.
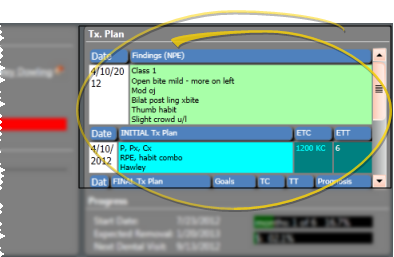
 Expand button in the upper-right corner of the chart. Click the button again to minimize the chart.
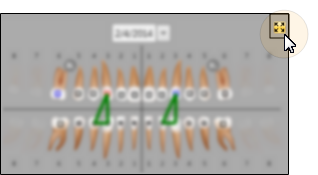
 Other Actions then select
  Reopen from the Patient ribbon bar to open a second session of the patient folder. If you have multiple screens, you can then drag one of the folder tabs to another screen. This feature is particularly useful for systems with dual monitors that want to keep the patient folder information available while viewing images (or any other page of the patient folder) on another screen.
 Refresh on the